Pumpkins growing on horse manure

Horse manure with a little saw dust, some pumpkin seedlings and some other seeds

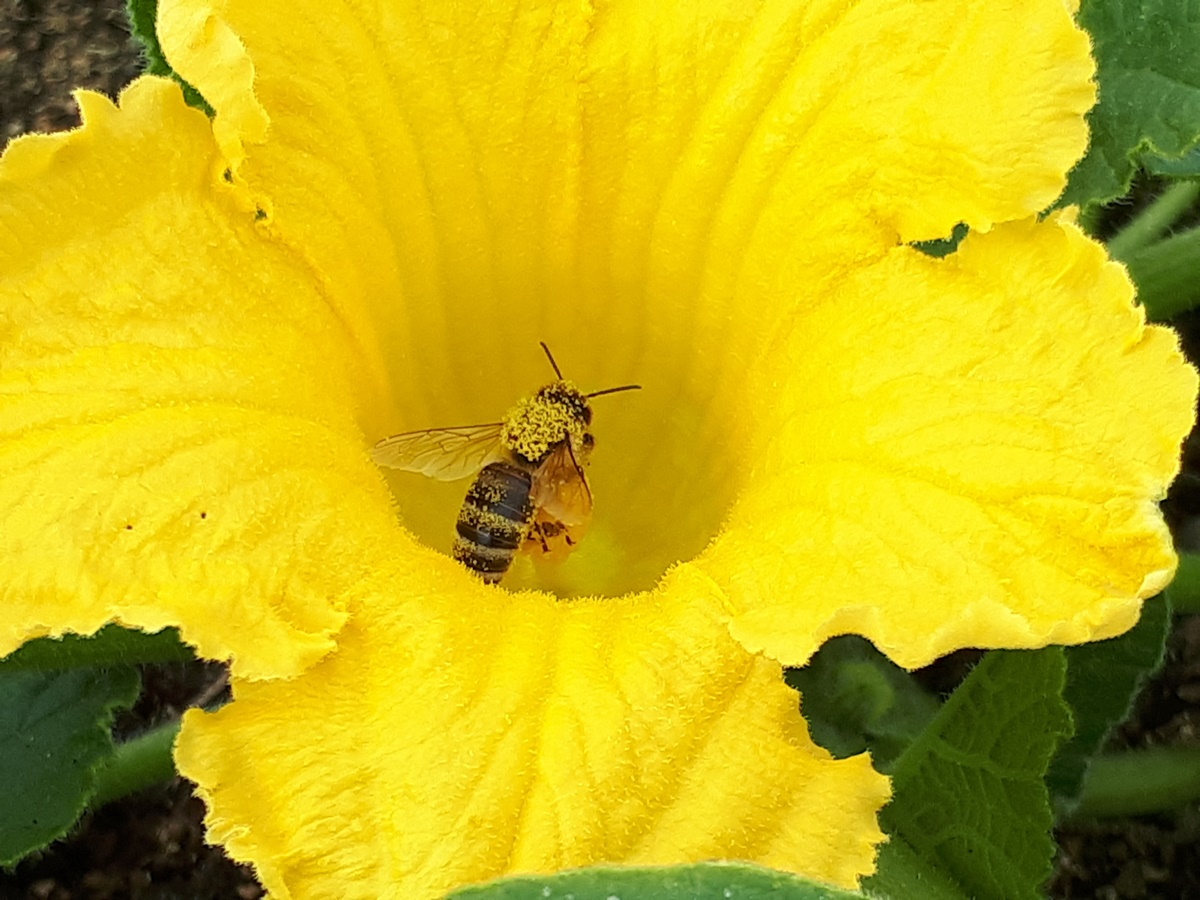
Another little flashback to last growing season, but this beautiful bee picture, I just had to share.

The next picture is not very sharp, but you can see that the bee is packed with pollen.

Flying bee packed with pollen
Bee packed with pollen

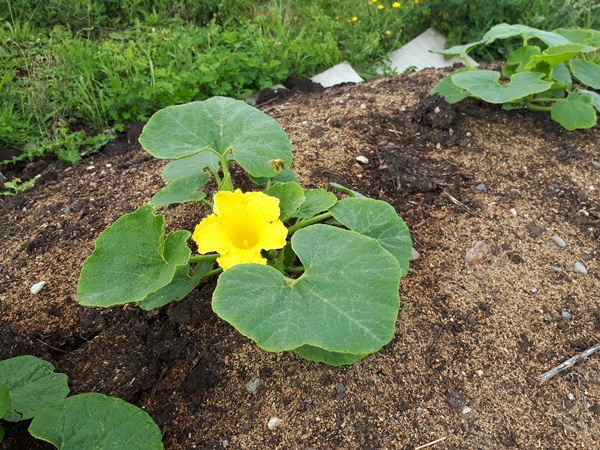
And where is this bee going? Well, the bee is visiting my flowering pumpkin; I rose from seed I saved the previous year from our own pumpkins. This growing season (2023) I had planted my seedling pumpkins in a new compost bed, which was not ready yet. As I had written before all but one pumpkin plants died. We love pumpkin soup and pumpkin pie, so one plant will not do for our needs. So first things first, we raised some new pumpkin seedlings from seed I had saved from our own pumpkins the year before. The only thing missing was an adequate planting spot, but my husband was able to fix that for me.

He scratched together what we had left of the horse manure we had purchased in the fall 2022. It was dry with very hard chunks, but after my husband mixed it with some saw dust and ran it through the manure spreader it was much more usable already. He dumped a big pile on some cardboard in our garden 4 just beside the failing composting bed.

Big pile of Big pile of horse manure mixed with saw dust lying on cardboard in a garden lying on cardboard in a garden
Horse manure mixed with saw dust

This was 25th of June, which is very late in the season to start with small pumpkin seedlings, but we planted them anyway. For the start we watered the seedlings a few times.

Beginning of August the seedlings had settled in nicely and started to bloom.

Small pumpkin plant with a yellow flower on the top of a horse manure pile
Blooming pumpkin plant

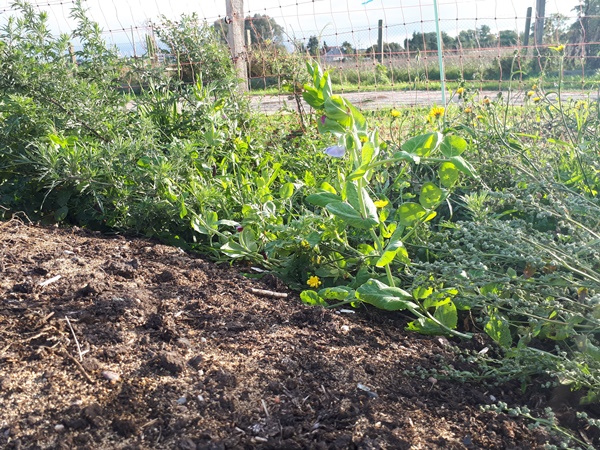
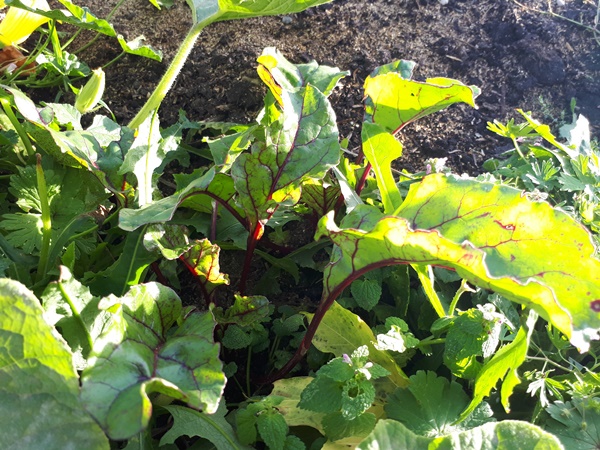
At this point I sowed some red beets and some peas in the sides of the pile.

Middle of September we had a whole rug of pumpkin plants.

A rug of pumpkin plants covering a whole garden patch
A rug of pumpkin plants

We where able to harvest, when I remember correctly, 6 ripe pumpkins of these plants and had a number of unripe pumpkins still on the plants.

An unripe yellow pumpkin still on the plant lying in the grass
An unripe pumpkin

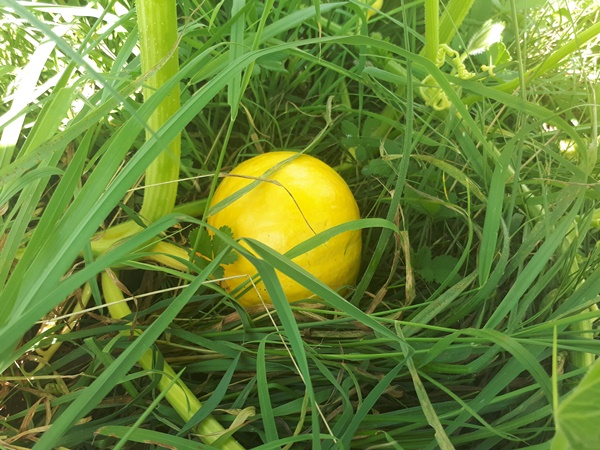
You could argue if the amount of work was worth the effort for “only” 6 pumpkins, but I am glad we did it. Now I know for the future that if the first planting fails there is time for a second planting to crop and we would not have to go without delicious pumpkins.

As for the peas and red beets, they looked beautiful by middle of September, but sowing beginning of August is definitely too late for them to crop. Only the peas and red beets at the bottom of the pile germinated, so higher up at the sides probably was not enough moisture.

A young pea plant right before flowering
A red beet plant peeking trough the weeds

O well, everything looked nice and we had the ground covered with plants, which is important to.

A new chicken coop on the quick

Transforming our geese coop into a chicken coop

In December the fox took our runner ducks and now he paid us a visit once again. The fox chewed itself trough the chicken wire of the coop and took our rooster and 3 hens. We had not been closing the little door of the main coop, thinking, behind the chicken wire the chickens would be safe. The fox made 3 holes in the chicken wire and we upgraded the chicken coop in order to close the holes. We attached some wooden boards around the bottom of the coop, covering the holes in the chicken wire this way.

Chicken coop with 4 white chickens scratching around

From now on we are closing the little door of the inner coop every night again.

2 Days after the fox attack the poultry dealer came into our village and we purchased 4 new chickens. They are called greenlayer and they actually lay light greenish eggs. We got one in white, one in black and 2 in gray.

Gray greenlayer behind chicken wire with a black greenlayer in the back

Well, let’s just say getting the new chickens was not a good idea. The old chickens attacked the new chickens right away. Since the new chickens just ducked and did not do anything else, we had to separate them before the old chickens would have eaten the new chickens. Since the new chickens where so out of the wind and hard to cache, we decided to take out the old chickens and put them into our livestock trailer for the time being. The white greenlayer turned out to be ratter aggressive to and we had to take that one out of the group of greenlayers as well. We put the white greenlayer with the old chickens hoping it would help that it has the same colour. It took several weeks, but they have arranged them selves.

Now to the new home of the old chickens. The livestock trailer is not very ideal, although it is spacious for the 5 chickens. It is old and the wooden panels are broken. Every time I opened the door I was afraid it would fall of, so we need another chicken coop soon. With little time on my husband hands we decided he would transfer the geese coop into a new chicken coop. The geese never really used the coop and since the gander turned so aggressive we luckily found them another home a few weeks ago.

My husband made the inner coop safe against fox and marten with a door with a more stable mesh fence and closing the front wall with wood. My husband builds a large aviary to the frond of the coop in which we put some old wood chips in which the chickens can look for insects.

A-frame chicken coop with 5 white chickens scratching around

I think the chickens are happy to be able to go outside and find insects again.

5 White chickens scratching around in woodchips

One of our dogs loves to keep watch in the shade of the chicken coop.

A Great Pyrenees resting in the shade of an A-frame chicken coop

Making a blueberry patch

Taking another step in building our food forest

For my last birthday I wished for some blueberry bushes to plant in our garden. We love the taste of blueberries and what we love so much we need to grow our selves. There is nothing compared to the taste of berries which are self grown and freshly picked and eaten right there in the garden.

So we went and purchased 10 blueberry bushes last fall. It took a little while before we actually planted them, but finally we did. Blueberries need acetic soil and we have this corner in our garden 3 where we filled up a big hole with sawdust, bark and smaller pieces of wood from our sawmill a few years ago. We finished this of with a layer of normal soil. The organic matter has been decomposing and we thought the time was right for planting by now.

The blueberry bushes should be planted 2 meters apart, but we just divided the 10 bushes on the designated patch. I always find it difficult to respect the recommended plant spacing. The blueberry patch still looks so empty with only the 10 blueberry bushes and a panicle hydrangea. After planting we divided a thick layer of woodchips over the entire blueberry patch. At first it looked really tidy and ratter empty. The naked blueberry bushes where hard to see against the background of the woodchips. Obviously the woodchips did not really hold down the weeds, but at least the blueberries have gotten there leaves now and the blueberry patch does not look so empty any more.

We got 5 different kinds of blueberries with different ripening times and so I updated my garden layout of our garden 3.

Garden 3

Blueberries (Vaccinium corymbosum)

  • B1: Berkley
  • B2: Herbert Frühreifend
  • B3: Ama
  • B4: Goldtraube 71
  • B5: Patriot
  • P6: panicle hydrangea, Rispen Hortensie

Here you can find the overview of our gardens.