Growing potatoes under hay

Doing things in the wrong order and putting potatoes back under the hay. Will there be anything to harvest this fall?

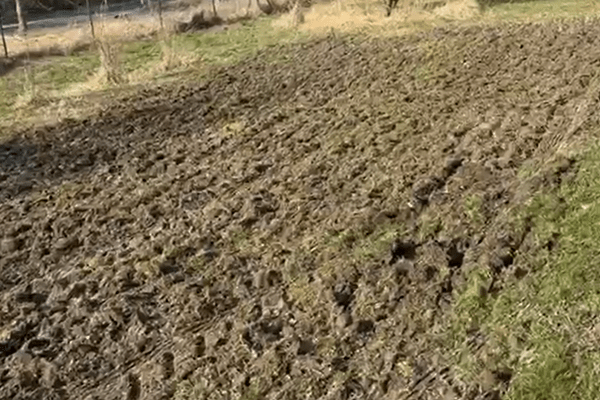
Since we have 2 out of 3 new created garden beds, in our garden 1, left and we have a big crate of sprouting potatoes in our barn, we might as well combine both.

A long garden bed with grass around it

Since this soil is very hard and we only loosened a top layer, we decided to plant the potatoes under mulch instead of trenching them. (Link to making this garden bed) This means, laying out the potatoes on top of the soil and covering them with a mulch. In our case we used a complete round bale of biomass.

A long garden bed covered with hay mulch, grass around it and a Great Pyrenees in the background

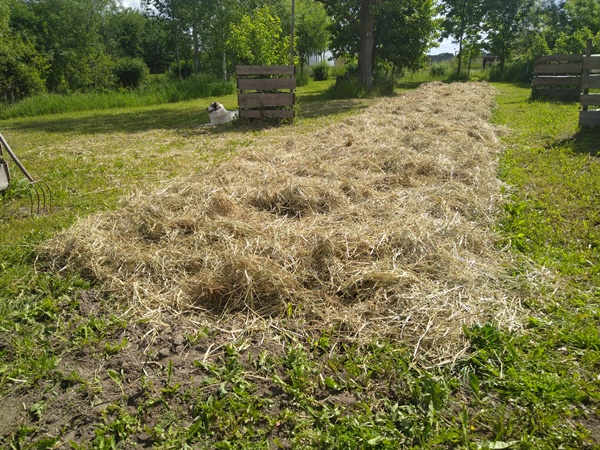
Since our potatoes where already sprouted with very long sprouts, I was worried that the sprouts would brake when we would lay them out first and cover them afterwards. Therefore we divided the biomass first and then planted the potatoes into the biomass. This was very exhausting and not something I would want to do this way again.

A long garden bed covered with hay mulch, grass around it, a measuring tape laying over it and a box with sprouted potatoes sitting beside it

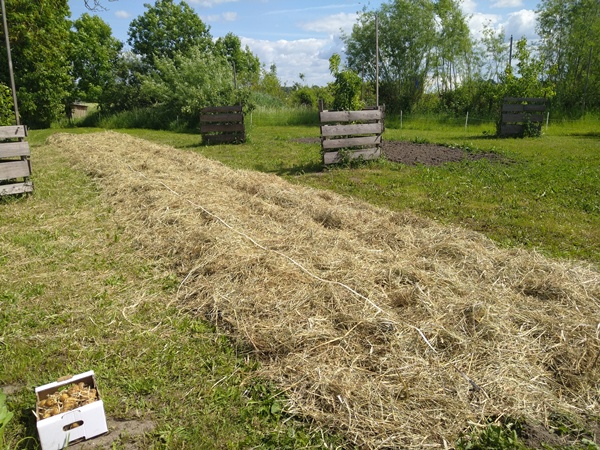
We used only the long garden bed (about 23 meters long) out of the 2, since I have something else planned with the other one. We planted 3 rows of potatoes about 60 cm apart and laid the potatoes about 30 cm apart in the row.

Since we had a good amount of rain this spring I thought we would not have to water before mulching, but while planting the potatoes I started wondering if the moisture in the soil would be enough. With a normal rain shower the water will not penetrate the mulch layer, so the change of extra moisture going underneath the mulch is very small. Just to be sure I did water the garden bed after everything was done. My husband parked our water trailer beside the garden bed and I laid out the garden hose and let the water run (on gravity) for about 10 minutes at the time on different spots along the garden bed. This way the water gets underneath the mulch and can spread and soak in properly. Normally you would give the garden bed a good soak before you put on the mulch layer.

A long garden bed covered with hay mulch and grass around it, with a Fendt tractor and a water trailer parked alongside it, with a garden hose laid out to the garden bed

We planted the potatoes end of May, but there is still no growth to be seen after two and a half weeks. I only had to replant a couple of potatoes in the mean time. Something has dough them up.

A potato lying on hay mulch in a garden bed

Now all that’s left to do is wait until the potatoes pop up and hope for the best, a good harvest I mean of course.

Creating new garden beds and planting onion sets

Creating new garden beds within a month, on a bad pasture, in order to plant my too many onion sets

I had nicely calculated how many onion sets I would need for the field I planned to plant onion sets and ordered the next bigger available size, so I would have enough. Apparently the onion sets where a little smaller this year and since they are sold after weight we got way to many onion sets. So what to do with them?

Create more garden beds of course. Around our pond we have space. This will be our garden 1. The last few years we have had our sheep there, but since the pasture is not really good (mainly weeds and not really grass) we have arranged a pasture somewhere else for them, where they are really happy. Partially the soil in this pasture is not too bad and with the sheep enriching the soil in the past there should be enough nutrients at hand.

But how to prep the new garden beds?

After going over different options, the best possibility for us in this case is using a disc harrow. After only one pass, the soil in the new forming beds looked like this.

Soil broken up once by a disc harrow

This was done 21st of March and then, after a little over a week, it was worked with the disc harrow a second time. After some waiting time where the bare lying roots of all the weeds and grass could dry out in the sun we rotary tilled the beds to loosen the soil. Obviously this does not kill off all off the grass and weeds and things keep popping up, so we worked the soil with the disc harrow again before we planted the onions.

We now are at the second half of April and planted a part of the onion sets in the field we bought them for. While doing so we noticed that a great part of the onion sets are bad. They are dried in and some are even mouldy, so before we planted the onion sets in our new garden beds, I went through all of the onion sets and sorted the good once for planting. I am glad I did. We only had enough left for the bigger garden bed out of the 3 new prepped garden beds. Now this field is nicely filled with onions as for the other field looks ratter empty as you will see in an upcoming post about that field.

Planting the onion sets

Since we have bigger plans for the future we have purchased a used planter for planting seedlings for behind the tractor. With this planter we also planted the onion sets and this worked well. The planter is ratter old and is only able to plant 3 rows now, since there are too little buckets for planting the seedlings/ onion sets and one part out of four, needed in the planting process, is missing. This means with one pass we plant 3 rows of onion sets about 25 cm apart with the onion sets about 15 cm apart in the row. Normally onions can be planted closer together, but with me and the kids sitting on the planter while my husband drove the tractor, the planting of the onion sets was not physical demanding and a lot of fun.

Since the garden bed is not exactly flat, the planting did not work well all the way. After the planting was done I went around with a rake and covered the onion sets that where exposed.

Garden soil with 3 rows of exposed onion sets

This garden bed has a lot of weed pressure, so we have been going through and picking the bigger weeds by hand and hoeing to take out the smaller weeds. The soil is clayey and gets hard easily, so the hoeing is needed to keep the surface of the soil open so the rainwater can soak into the ground.

In the spring I made a small bucket of stinging nettle manure to use in the greenhouse, but I decided to use it for these onions first, since they are on a spot where the sheep did not really get to much the previous years. Since onions need “food” and we did not bring any compost here, I hope that this gives the onions an extra boost.

Garden bed with rows of onions, freshly watered with a hoe laying around and watering cans and buckets sitting next to it

We are having a wet and ratter chilly spring with some warmer days, which the onions seem to like, while they are looking good so far.