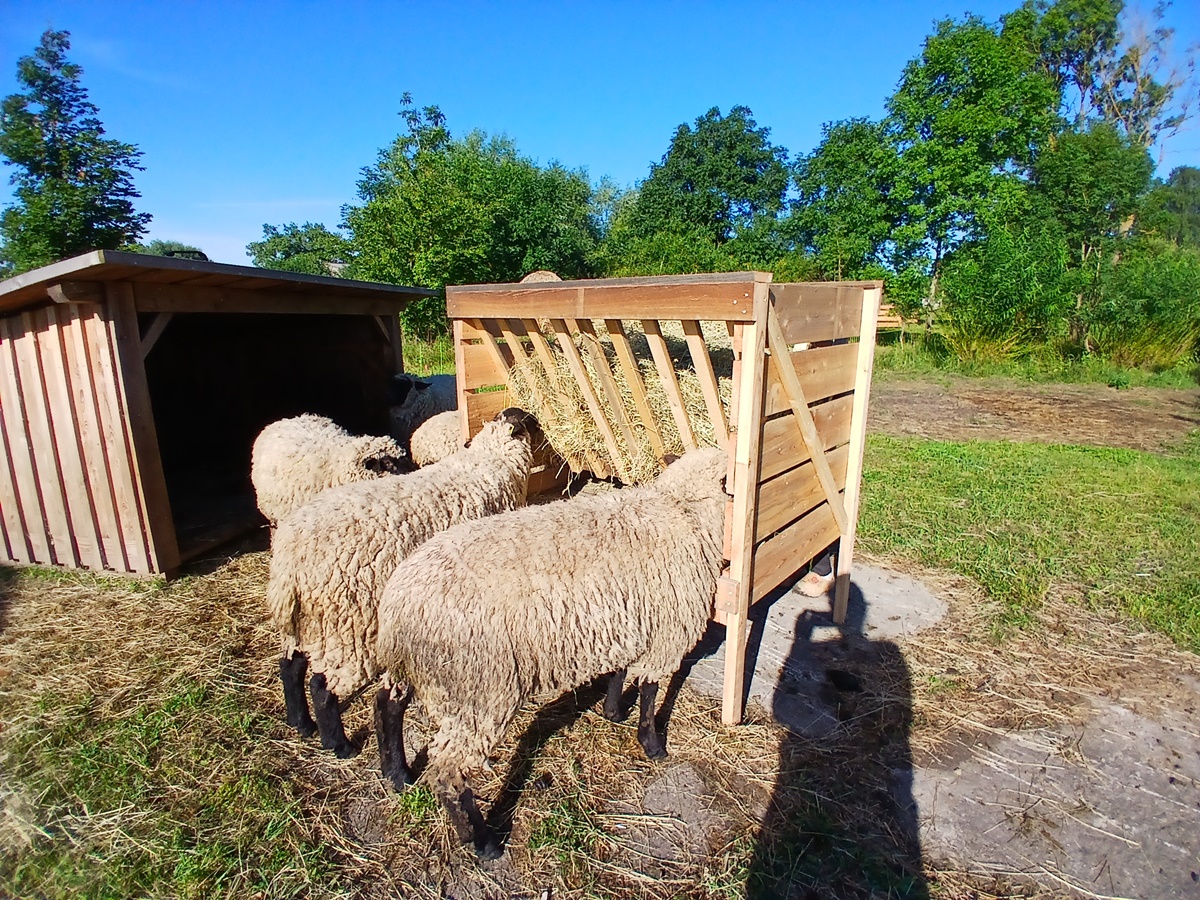
A sturdy, functional and easy to fill hay rack made out of wood
We separated our goats from our sheep, since the goats are … goats and keep beating up the sheep. Our goat ram had prevented our sheep ram to inseminate all of his ladies last winter and the 2 ladies he did inseminate unfortunately lost there lams.
For the new goat stable we “stole” the hay rack from the sheep stable and needed to build a new one. We where not happy with the hay rack at the wall inside of the sheep stable, anyway.
My husband and son build this standing alone and easy to fill hay rack.
At the moment we are filling the hay rack with hay we put in baskets first, since we are working from a round bale, but the hay rack is meant to be filled with a small square bale, which makes it quick and easy to fill.
There is a table underneath the hay which catches the hay falling out when the sheep are eating, instead of falling to the ground where it will be stepped on.
The hay rack stands stable and is accessible from two sides, so the sheep can all easily eat at the same time.
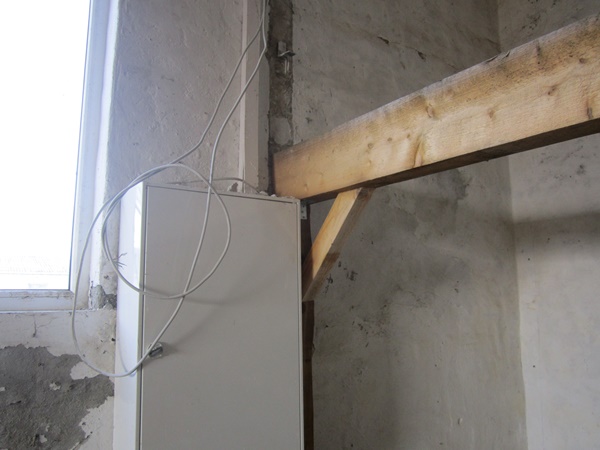
Since we are living in a caravan without a shower and, most of the year, it is to cold and windy to shower outside, we are going to build a bathroom inside our barn with a work shop on top.
Desirable was we could have build the house we had in mind, with a bathroom, but that dream has been swept off the table by the official authorities. We will wait a few years for curtain things to change and try to get an approval for building our house then.
But until then we need a few things set in place to make our daily life a bit nicer and easier, starting with a bathroom and a playroom for the kids/ sewing room for me. Obviously the last two will be one room.
This structure inside our barn will be insulated and we will be able to heat it. I am so very much looking forward to be able to use this room. Since we have sold our Tiny House I had to pack my fabrics and sewing machines into our storage. I am missing being able to sew clothing for my children and me.
Also the kitchen in the caravan is very small, too small for kitchen appliances to make life easier and make cooking more time efficient. I like to make my own yoghurt, I bake my own bread (the hand mixer is on/ over its limit with this), there is no place to put up my ferments (in the barn they turn bad), etc. I also want to make my own soap again and make our own cheese again. The pressure canning I did last fall was a bit unpleasant in the cold (almost freezing) and I had to put the hot jars in the caravan to let them cool down slowly, which took up a lot of space.
One other major thing that needs space is a freeze dryer. I really want to have a freeze dryer for preserving our harvest from the garden this year. So the room we are creating will hold my sewing supplies, my kitchen appliances and a freeze dryer which I hope to purchase this year. The room will not be very big, so we will have to see how we will get everything a usable spot, a working space and some room for the children to play, but more to that in a later blog post.
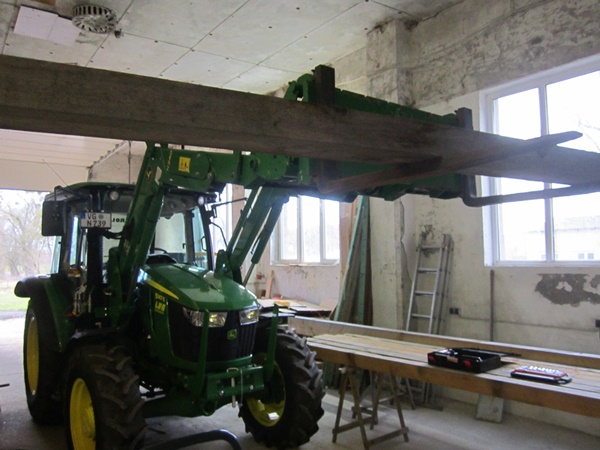
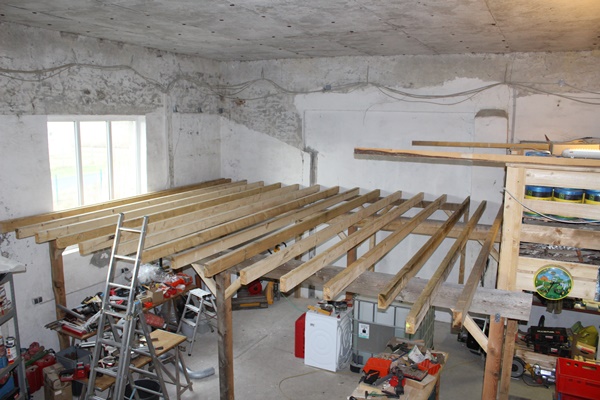
For this project it is very convenient that we have a lumberyard, since we did not plan ahead, but came to this idea only recently. The support frame is made out of beams and posts which where for a customer who changed his mind about the size of the lumber, so these have been sitting for a while already. That is great, since you should not build with freshly cut wood, but let lumber sit for a while first. The rafters and planking where also already sitting, meant for a different project.
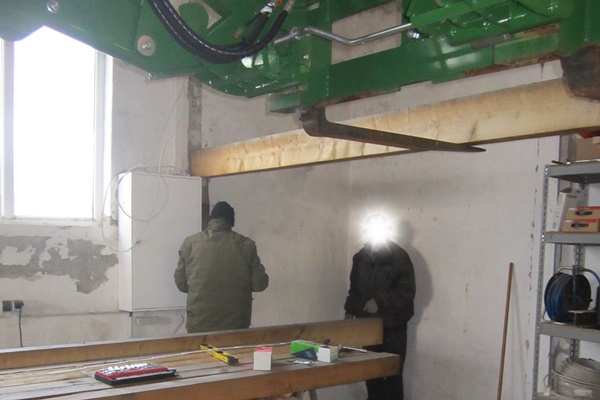
The building started with positioning the big beams with our tractor, they are too heavy to lift by hand.
Then the posts are positioned and fixed underneath with metal angles.
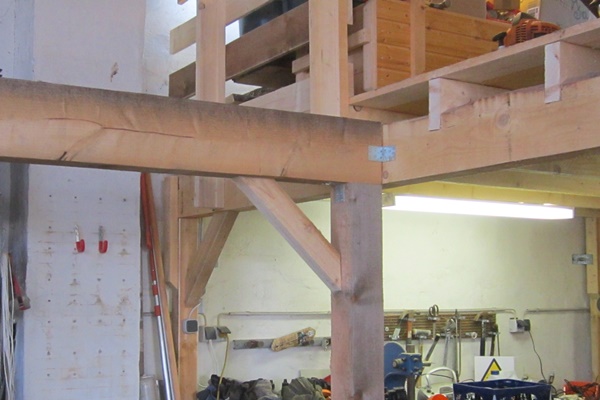
To give the structure stability, bracings are put in place in the corners.
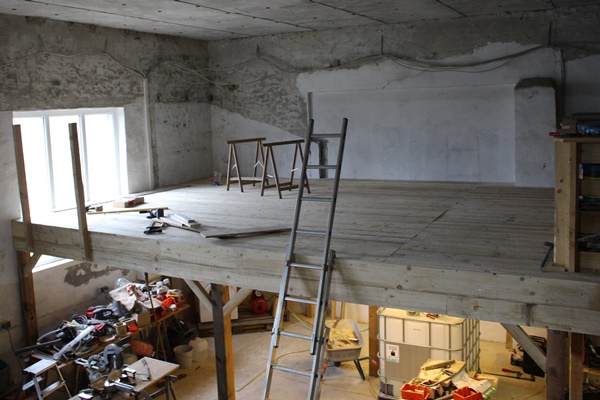
The deck is made with a lot of rafters and planking on top to close the surface.
Some lights are put in place underneath the deck.
To make the deck safe to use, a railing is attached and of course a stairs is made. For the safety of our children a gate is made on top of the stairs and in the middle of the railing a gate is made, so we can put things up on the deck with the tractor.
Now the first stage is done and my husband needs to set up his workshop again. Smaller tools and all of the supplies will go on the deck and the bigger machines will find there place on ground level. Next thing to do is framing of the walls, but that is for another time.
We are not hooked up to the sewer and need a solution for our waist water. We are in a water protection zone and have been asked not to dig any holes deeper then 50 cm into the ground. We have not found any cistern with qualification for above ground, so we some how have to build in an underground cistern above ground.
We decided to sacrifice the corner in our barn directly beside the big door, so the cistern would be protected from the sun and easily accessible for emptying.
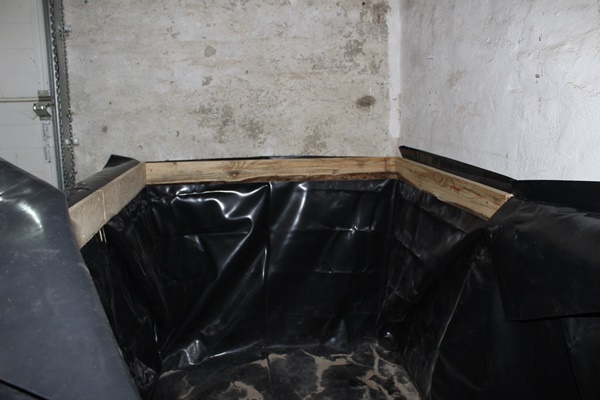
An underground cistern, obviously, is made to go under the ground. This means the cistern gets pressure from outside to withstand the pressure from the inside when it is full. If this pressure on the outside is not there, the cistern could get damaged. So we came up with the following way to build in this cistern above ground.
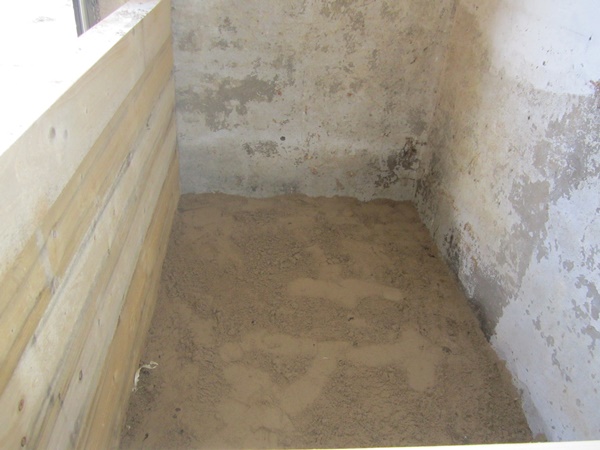
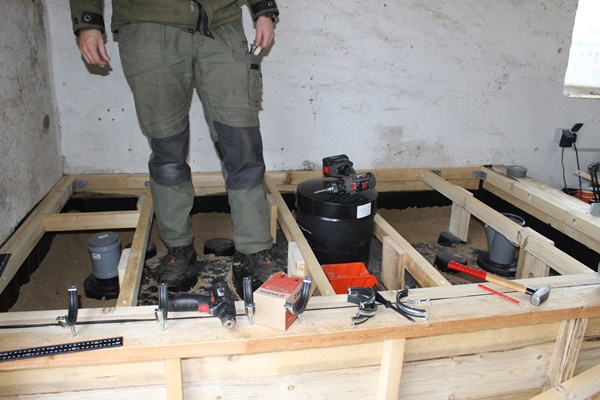
We started by building a wooden construction coming out of the corner about 20 cm bigger as the cistern is.
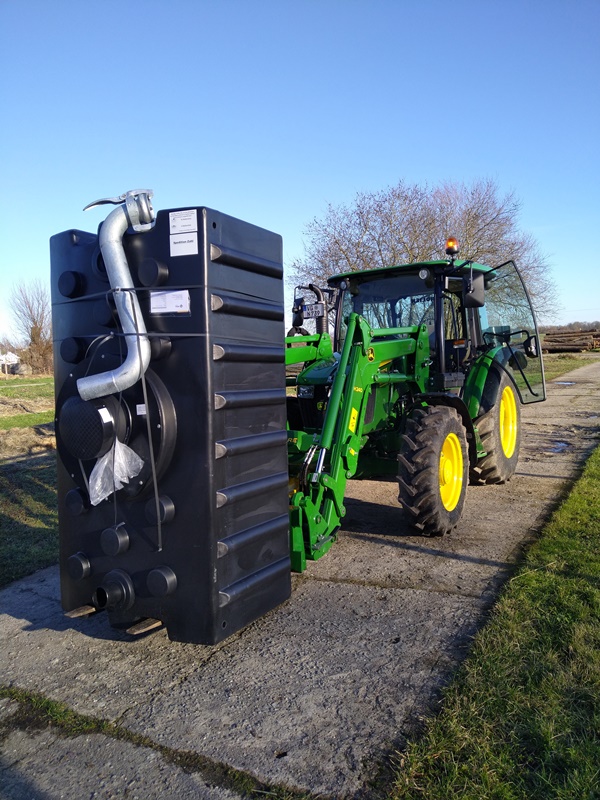
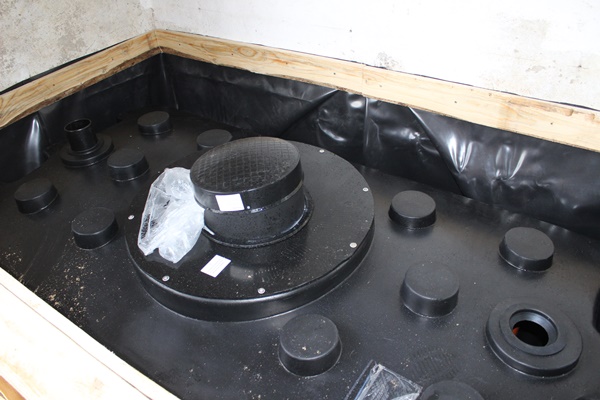
This is the cistern we bought.
We put in a thin layer of sand on the bottom to protect the pond liner, which is coming in next, against any sharp spots in the concrete floor.
We have laid out the entire basin with the pond liner, just incase there would be a problem with the cistern, the waist water will be contained and not flood our barn.
This would also have made for a nice pool.
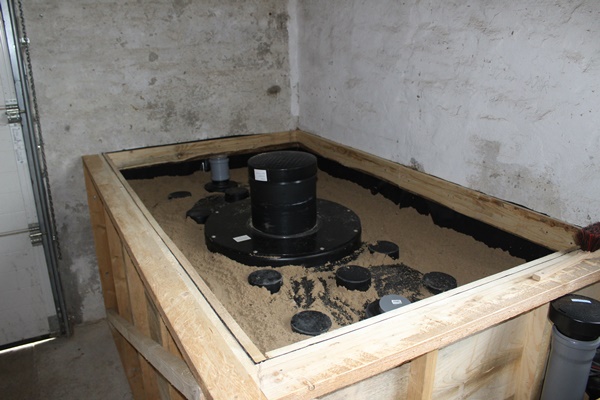
After another layer of sand the cistern is put in place.
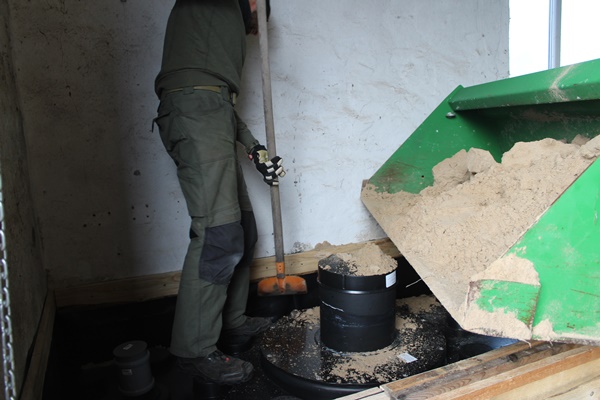
Around the sides is also filled with sand which we compacted.
Then we build a deck on top, so we can stand on it to empty our toilet waist in the cistern. The pipe going up is for venting. It has a filter on top, so it won’t smell bad in our barn. The metal pipe is for draining the cistern. The big black lid in the middle is where we can fill in our waist water. The hole in the deck is where we will connect the outlets of the toilet and the shower we are going to build in into our barn this year. Obviously that would not work by gravity, so we will put a waist water shredder pump in between, but that will be a future project.