It has been a wile since I wrote about our Tiny House. I wanted to finish the series with a Post about finishing the Tiny House by finishing the kitchen. Unfortunately we never got around to that and now we are trying to sell the Tiny House, because we want to move to Denmark.
So in the last Post we laid the floor (Our Tiny House. Part 4. Working on the inside). Before we could do that we had build in the basic construction of the kitchen and that is where we are starting on now.
We have this old kitchen cabinet from Ikea and made it prettier with some life edge Larchwood plank and hang it on the wall. Beside this we attached a Larchwood plank on the wall to put our backing oven on. The chain on the left is holding up that point of the plank and gives a nice decorative touch.

The next thing is a sink with a tap, so we can actually start using the kitchen. We bought a camping set with a small sink, a tap, a 12 Volt water pump with a 12 Volt power supply, a water and a gray water canister and the piping. The installation was easy. A hole for the sink and a hole for the tap. Put everything in place and connect a power cable to the 12 Volt power supply. Shorten the pipes as needed and connect everything correctly. And I was very happy to have a working sink in the kitchen and at this point we already moved in and used the kitchen.

At the back wall in the kitchen we made a planed plank which I oiled with sunflower oil so it can be wiped of when dirty.

Next thing we added was light. We attached a LED-strip behind a trim and attached the trim underneath the cabinet and plank. For power we connected this to the 12 Volt power supply of the tap.

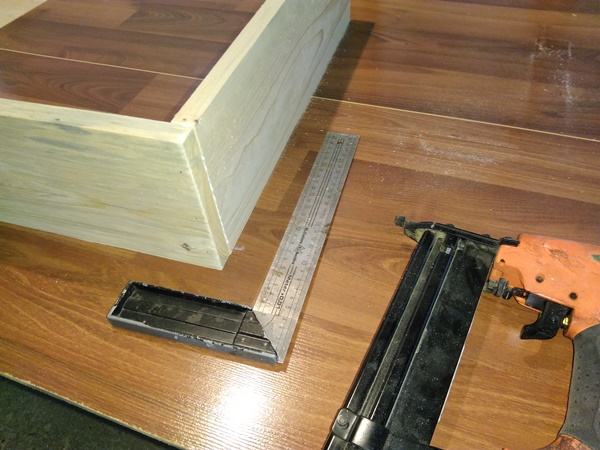
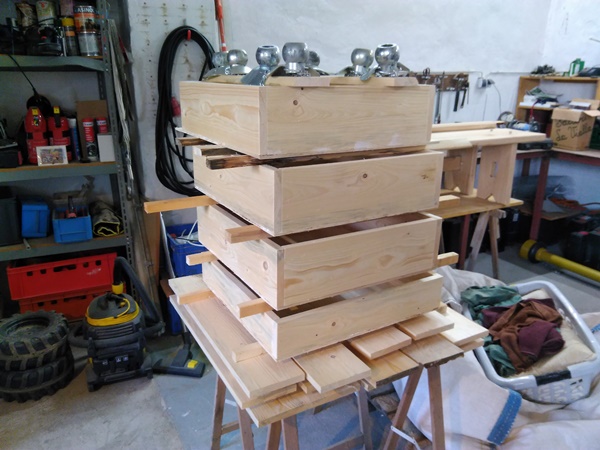
Then my husband made 4 drawers to put into the kitchen. The drawers are put together with glue and pin nails. After they dried we started fitting the drawers into the kitchen. The bottom drawer first and making sure to have it plum. The middle part of the kitchen got 3 drawers and they are nice big drawers that come out completely which I find very practical.


After that we never came around to fitting the last drawer, so this is the end result.
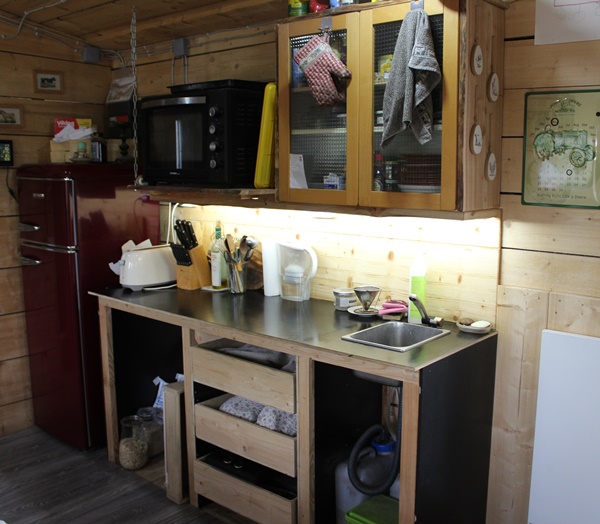
At the left is where the thinner drawer should have come and we had prepared some nice Larchwood planks to finish the drawers of with. That would have looked very good, but now we are going the sell our Tiny House, so we will not finish the kitchen anymore. Except of course when there comes a buyer who wants to keep this kitchen and wants it finished.