Why are my compost beds not breaking down?

My compost beds are not composting. Why is that?
Here’s what we found & what we did to solve the problem

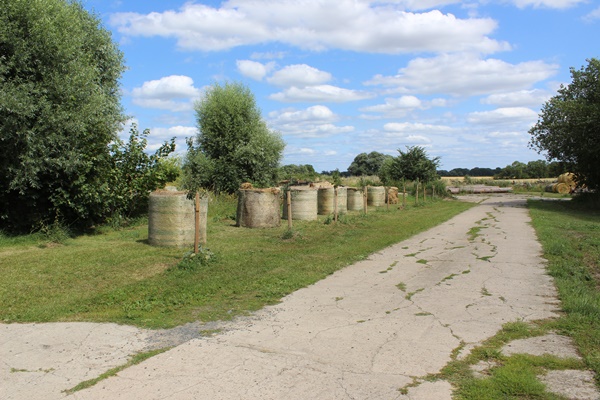
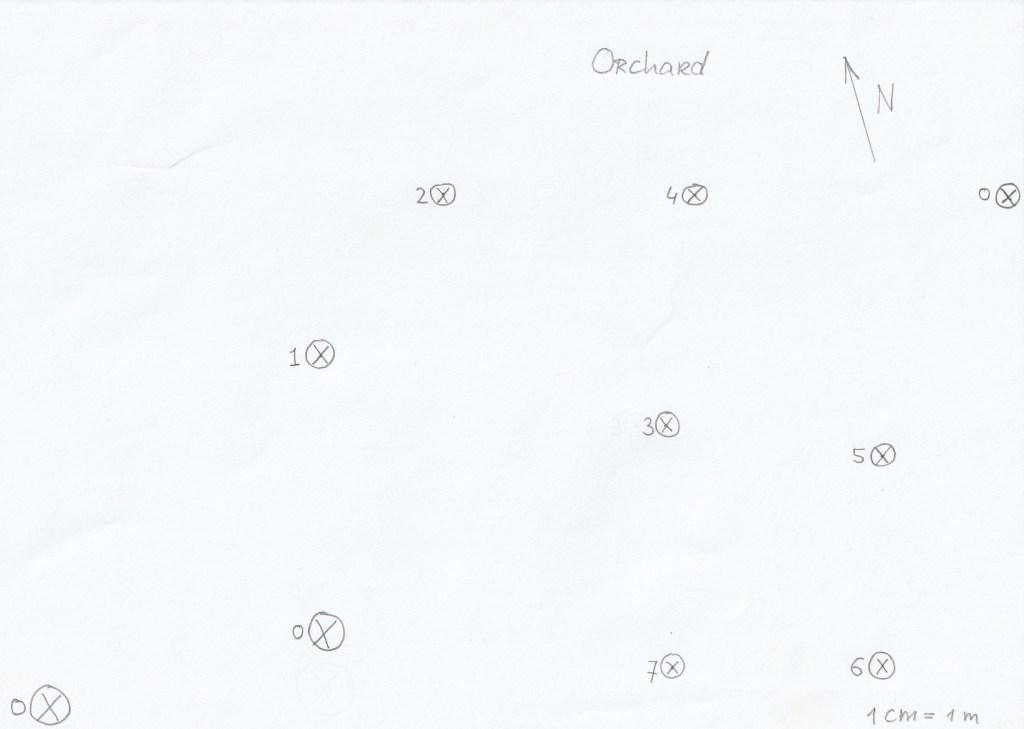
In the summer we made 3 new garden beds for growing vegetables to increase our self sufficiency. Since we mainly have rubble and concrete the beds need to be made out of enough material for the plant roots to grow in. The compost beds are make out of straw, hay and some sawdust. If you would like to read more about how we made these beds you can find the link here. The idea was that these compost beds would compost over winter and we would be able to plant in them in the spring. At least so we thought….

Checking up on the progress of the compost beds

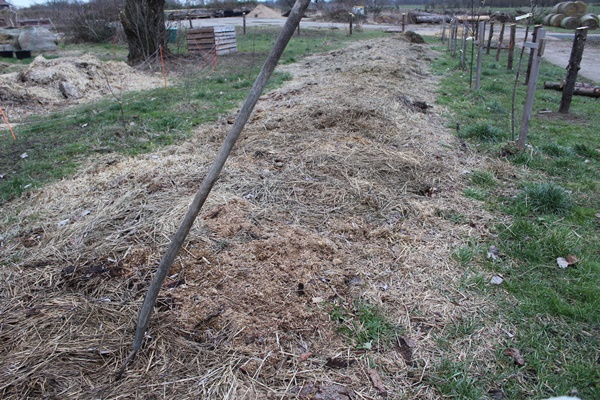
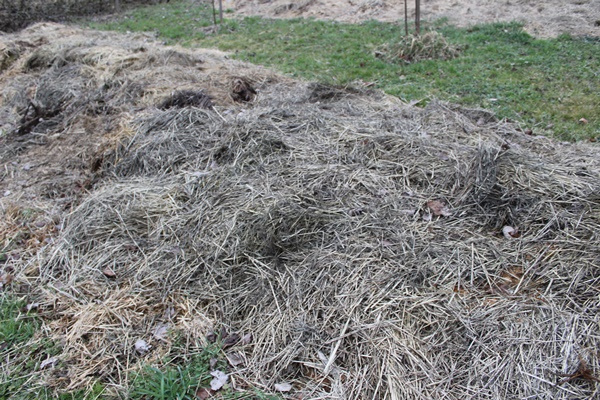
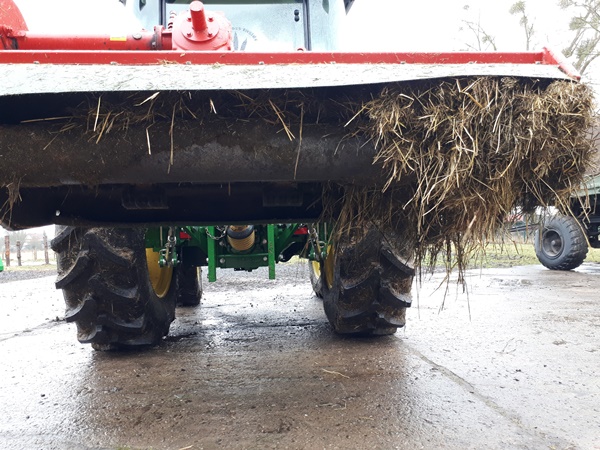
In February we went to check upon our composting beds and found that they are not composting. As you can see on the pictures the top layer functions as a roof and prevented the rainwater from soaking in the composting bed. (We had more than enough rain in the fall & trough out the winter) The straw and sawdust underneath is completely dry and at the bottom there are some fungi. Only in this bottom layer we found some earthworms, but not many, and in the rest of the composting bed there where no earthworms at all.

What is the problem?

So first things first. We need to do something about this, since we need these beds in spring to grow more vegetables to get closer to our goal of self sufficient living.

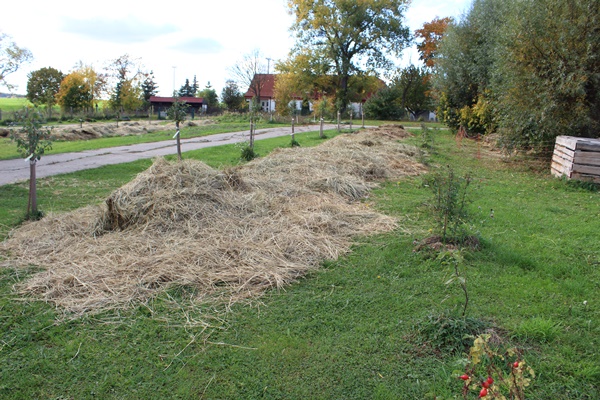
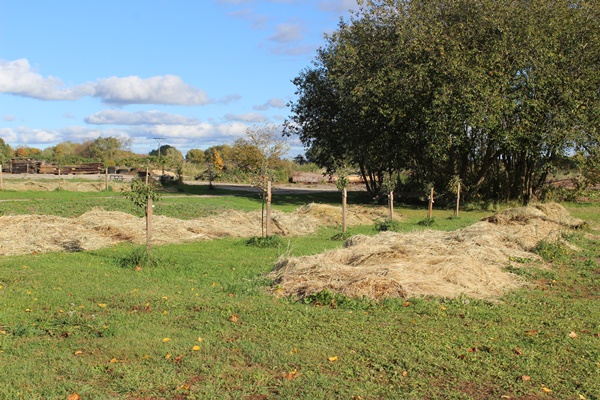
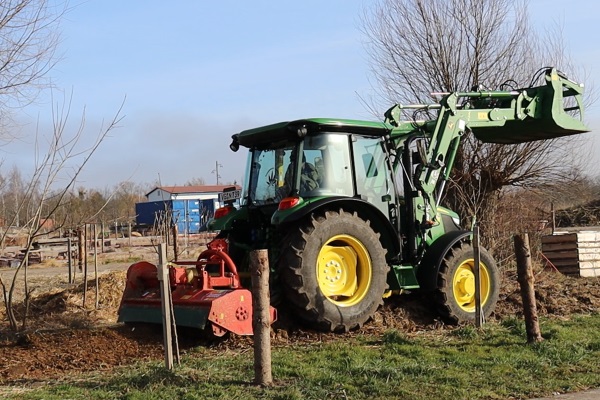
The compost beds are made out of long material and the material is to compact. So that is what needs to be changed in order for the rainwater to soak the compost material. Ideal would be to use a rotary tiller to work trough the compost beds, but since we do not have one we decided to flail mow over one bed to see what that brings.

Flail mowing one compost bed

We mowed a few times over the composting bed in garden 3 (this was middle of Feb.). This needed to be done at a very slow pace, since the flail mower got jammed other wise.

At first site we where satisfied with the result. Nice short and dark material where the rainwater would be able to soak trough.

Compost bed after its been mowed with a flail mower with short dark material and a white dog on top

After doing some digging we found that underneath this, very promising looking thick layer, the straw was still untouched. Obviously a flail mower isn’t a rotary tiller and works only on the surface. So we decided to wait and see what this does the coming weeks and treat the other beds differently.

Air raiding the other 2 compost beds

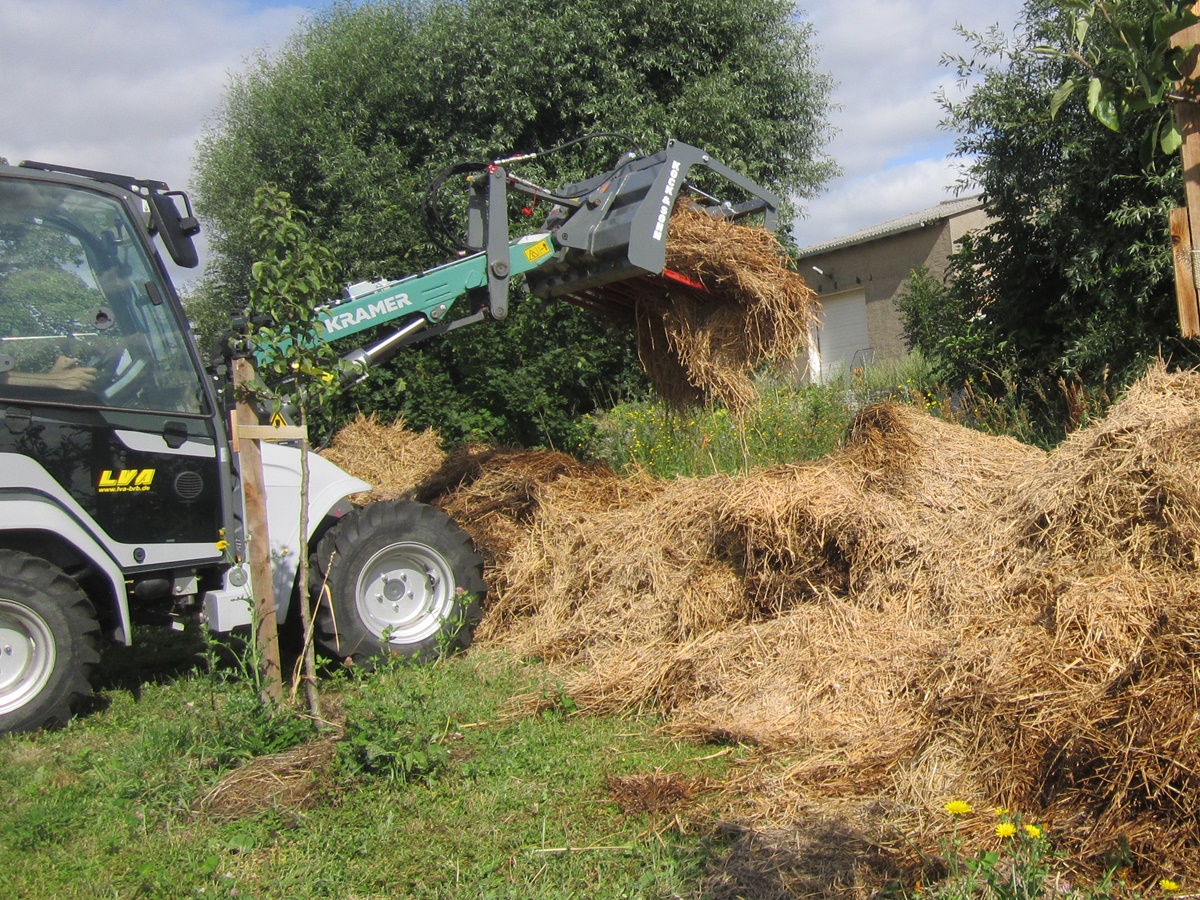
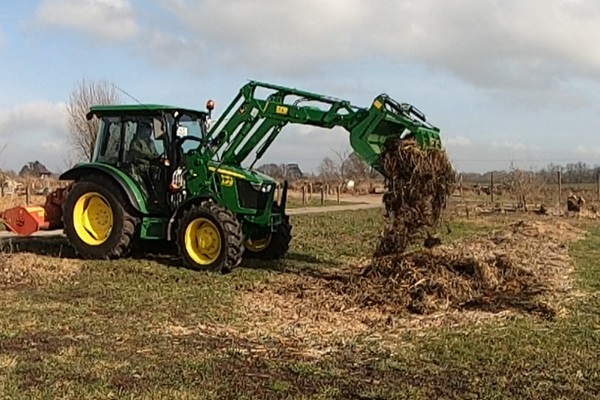
We only loosened and air raided the other 2 compost beds in garden 4. This way at least the rainwater can soak into the material and it is accessible for earthworms and other creatures helping with the decomposing process. We did this with the tractor and grabble.

Watch these actions on video here (second half)

By the time we finished air raiding these compost beds, we found a manure spreader within our budget and plan to send the material from these 2 compost beds trough the manure spreader as soon as we have it on our property. So stay tuned for that.

Turning hey and straw into compost garden beds for our self sufficient living

Building long compost piles to serve as vegetable beds on rubble for spring planting.
Expanding our thriving vegetable garden on rubble for more self sufficiency.

We strive to become mostly self sufficient when it comes to our food. We established a lot of garden beds on rubble last spring. We made raised beds and filled them with normal soil we had bought. Buying the soil was needed to have a decent start in growing our own food and planting the fruit trees we had purchased. We just are not very fond of it, since there is no life in the sifted soil and the nutritional value is also very low. Although, after a growing season, these beds are getting better and are filling with life, we prefer to try out new ways of creating soil to expand our garden area. After seeing a video about the “Ruth Stout no work gardening method“ I suggested to just roll out a straw bale in the fall and sow in there next spring. Well rolling out a big round straw bale is not that easy and we do not really have soil (mainly rubble) underneath for the plants to grow in, so we decided to give it a little different approach. Mulching is not enough we need to build up soil for the plants to grow in and this is how we started.

Building compost beds

We are starting of with a bunch of round bales which have been sitting on the round site of the bale. Normally you do not store round bales like that, but we actually pressed these bales to compost for soil for growing vegetables and had used these bales as a “fence” and windbreaker around the children’s playground last winter. Here’s the post about that. We where hoping that if the bales sit like that, moisture goes in and in the bales the decomposing process will start. This did not happen and the bales did not really start to decompose, so we decided to use the straw as it is and see if the straw decomposes better if we spread the bales out.

We have 3 beds we want to build with these straw bales. We used our wheel loader to pick them up and divide them on the 3 rows we want to build up new garden beds.

After removing the netting we used the wheel loader with grabble to loosen the bales and make a row with the straw.

This was done last July and after a bigger saw project we divided the sawdust that came together over the 3 rows as well.

After a while the dogs had flattened and compacted the straw by playing over it and we found that the new garden beds had too little material, so we rolled one hay bale per bed out over the beds. This we just let sit over winter and hoped the material would decompose in time to plant in the spring.

Meanwhile we know this was not sufficient and we give the beds a different working to get the soil we need in time for spring planting. With time we will see what works better. I will document this in a separate post. So if this interests you, stay tuned for what’s next.

If you want to see what we did, here’s a video for you.

Garden Layout

I finally brought myself to make an overview of my gardens and mark out all of the different fruit trees, Berries, Herbs and other perennials I have planted. Somehow these things, on paper, always tent to disappear, so now I am posting my garden layout, so I will always find them again.

My Gardens are in line from Nord to South starting with the Orchard, then Garden 1 (which we have not set up jet), followed by Garden 2, Garden 3 and Garden 4.

Fruit trees

Orchard

These where planted in the fall of 2021

  • 1: Pear “Williams Christbirne”
  • 2: Prunus avium Kordia 6. Cherry week/ Kirschwoche
  • 3: Pear “Köstliche aus Charnaux”
  • 4: Winter apple “Golden Delicious“
  • 5: Apple Tree (I do not know the variety)
  • 6: Peach/ Pfirsich “Früher Roter Ingelheimer”
  • 7: Pear “Clapps Liebling“
Layout Orchard

Following trees are divided over the gardens 2, 3 and 4 and where planted in the spring of 2022

Apple trees

  • A1: Malus “Elstar” CAC mittel
  • A2: Malus “Spartan” CAC mittel
  • A3: Malus “Pommersche Krummstriel” CAC mittel
  • A4: Malus “Gravensteiner” CAC mittel
  • A5: Malus “Roter James Grieve” CAC früh
  • A6: Malus “Purperroter Cousinot” CAC spät
  • A7: Malus “Cox Orange Renette” CAC mittel
  • A8: Malus “Weißer Klarapfel” CAC früh

Pear trees

  • B1: Pyrus com. “Conferencebirne” CAC mittel
  • B2: Pyrus com. “Clapps Liebling” CAC früh
  • B3: Pyrus com. “Gute Graue” CAC mittel
  • B4: Pyrus com. “Alexander Lucas“ CAC spät
  • B5: Pyrus com. “Köstliche von Charneu“ CAC mittel
  • B6: Pyrus com. “Gräfin von Paris“ CAC spät
  • B7: Pyrus com. “Williams Christbirne“ CAC
  • B8: Pyrus com. “Rote Williams Christ“ CAC
  • B9: Pyrus com. “Bosc’s Flaschenbirne“ CAC mittel

Plum trees

  • C1: Prunus dom. “Hauszwetsche“ CAC mittelspät
  • C2: Prunus dom. “Anna Späth“ CAC spät
  • C3: Prunus dom. “Bühler Frühzwetsche“ CAC mittelfrüh
  • C4: Prunus syr. “Von Nancy“ CAC Mirabelle
  • C5: Prunus dom. “President“ CAC spät Pflaume
  • C6: Prunus dom. “Königin Viktoria“ CAC mittelspät Pflaume
  • C7: Prunus ital. “Graf Althans Renekl.“ CAC mittel Reneklode
  • C8: Prunus dom. “Ontario“ CAC früh
  • C9: Prunus ital. “Große Grüne Renekl.“ CAC mittel
Layout Garden 2

Berries

Raspberries

  • R1: Kinder-Himbeere, Glen Ample (Also in the raspberry row, I just don’t know where)
  • R2: Tula Magic
  • R3: Herbsthimbeere, Autum Bliss
  • R4: Polka
  • R5: Rubus id Tulameen
  • R6: Herbsthimbeere, Zefa Herbsternte (I forgot to write this down on time and do not know which one this is)

Currants

  • J1: White Currant, Weißer Versailler
  • J2: Black Currant, Titania

Grapes

  • G1: Vitis, Grape vine Idera, Yellow, only little seeds, mildew resistant
  • G2: Vitis, Grape vine Magdalena, Red, only little seeds, mildew resistant

Mulberry tree

  • M1: Mulle

Herbs

  • H1: Thyme/ Thymian (brought with me from Italy)
  • H2: Oregano
  • H3: Lemon balm/ Zitronenmelisse
  • H4: After eight mint
  • H5: Sage/ Salbei
  • H6: Camomile/ Kamille

Perennials

PlantsGarden 2, Plant bed
P1: Peony “Coral Sunset”IV
P2: Peony “Full Moon”
P3: Peony “Cora Louise”
X
P4: Hydrangea blueXII
P5: Jerusalem ArtichokeXVI
XXIII
Layout Garden 3

Overwinter crop

Garden 1

  • This Garden does not exist jet

Garden 2

Plant bedCrop
IIIYellow winter onion set “Shakespear”, 2 rows
Leaving space in between two rows to sow carrots
IVSpelt/ Dinkel, First half of plant bed
VRed winter onion set “Rote Winter”, 2 rows
Leaving space in between two rows to sow carrots
VIStrawberries
VIIIGarlic rosa “Germidour”
XOnion “Snowball”, left side, 1 row
Onion “Senshyu Yellow, right side, 1 row
Leaving space in between two rows to sow carrots
XIIEmmer, First half of plant bed
XVRye/ Roggen, Front side of plant bed is a little space free for flowers
XVIIIStrawberries
XIXStrawberries
XXWheat/ Weizen, Left side
Winter hedge onion/ Winterheckenzwiebel, Right side
XXIIEinkorn
XXVGarlic white “Messidor”

Some side notes

  • XIII: This is the only bed that we dough. We dough in the straw that was on top the entire season, sowed green manure and put new straw on top. We want to see if this makes a difference to the other beds.
  • Green manure was sowed in the following beds: VI, VIII, XIII, XXV

Garden 3

  • I: Garlic “Ajo Spring Violeta”, 2 outher rows with space in the middle
Layout Garden 4

Garden 4

  • Still empty