The first strawberry flowers of the season
We can hardly wait for the first strawberries to grow and ripen. There is nothing better then strawberries from the own garden.

We can hardly wait for the first strawberries to grow and ripen. There is nothing better then strawberries from the own garden.

Tilling half of the compost bed to see if there will be a difference in potato harvest this fall
Finally we have finished the fence around garden 3, so the dogs can’t get in anymore, and it is potato planting time. I have been looking forward to finally starting to plant potatoes.
A little over 2 months ago we flail mowed over this experimental compost bed, hoping to improve the decomposing process. On top the result looked nice, but underneath the straw was untouched. At the time we did not have a rotary tiller, which we would have preferred to use, so we just let the compost bed be and see what happens with time.
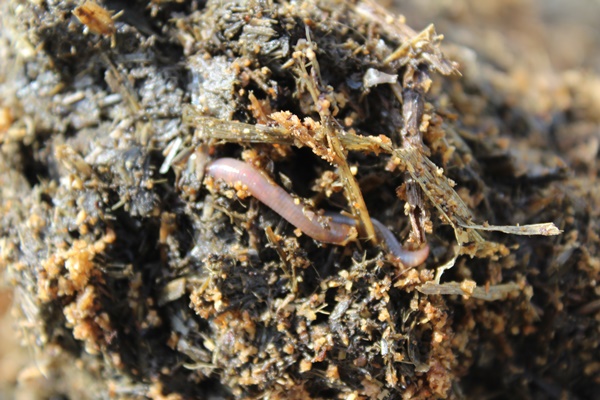
Now, 2 months later, after doing some digging we found the compost bed looking quite ok, but obviously the material has not broken down completely. At least the rainwater could soak in and all of the material was wet and the decomposing process has progressed. There are a lot of earthworms in the compost bed, which is a good sign.

The compost bed is not finished decomposing yet and I hope it will be good enough for the potatoes to start in. Since I have way to little planting space for all of the potatoes it will have to do.
Recently we found a used rotary tiller for an acceptable price and where able to purchase this. Not quite curtain about the usability of the compost bed and I was worried that the rotary tiller would kill all of the earthworms, we decided to rotary till half of the compost bed and see if it will make a difference in harvest once the potatoes are done.

The rotary tiller we have purchased was modified by the previous owner, who had fixed the retaining board in a certain position. Normally the retaining board is hung up with some chains enabling the board to move up and down as needed. Using a rotary tiller for the fist time we just left that how it was. We tilled over half of the experimental compost bed twice and noticed that we need to do something about the rigid retaining board. Since the compost material is very moist the rigid retaining board pulled grooves in the material, which I closed by hand.

Starting half way the compost bed some material was thrown over back wards on the part of the compost bed we did not till. I shovelled that back and made the tilled part of the compost bed nice and evenly. The tilled part of the compost bed looked nice and fluffy and was much higher as the part we did not till. All of the different material was mixed together well (small parts, bigger parts, already decomposed material).
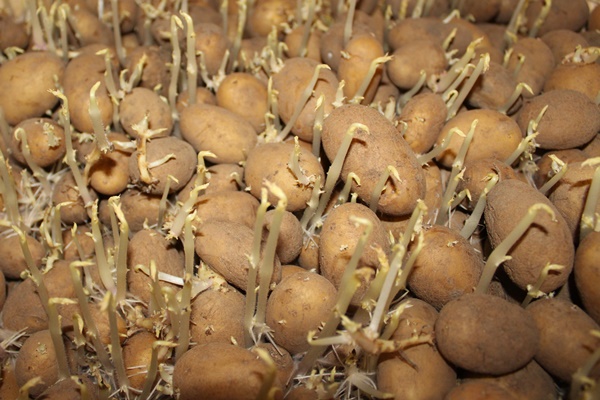
I only have a lot of small potatoes left in my storage and these are al sprouting. (Unfortunately I am buying potatoes for eating at the moment) This means I have more than enough seed potatoes and I did not buy any.
This does raise the question as to where on earth am I going to plant all of these potatoes? Well, I am starting in this experimental compost bed and just go from there.
In the part of the compost bed that we tilled, it was very easy to make a trench in the loose material.

On the other hand I very much regretted not to have tilled the entire bed while making a trench in the part that we have not tilled. This material was ratter compact and hard work to make the trench.


I made two trenches about 50-60 cm apart. The distance in the row could have been a bit more, but the compost bed is not wide enough for that.

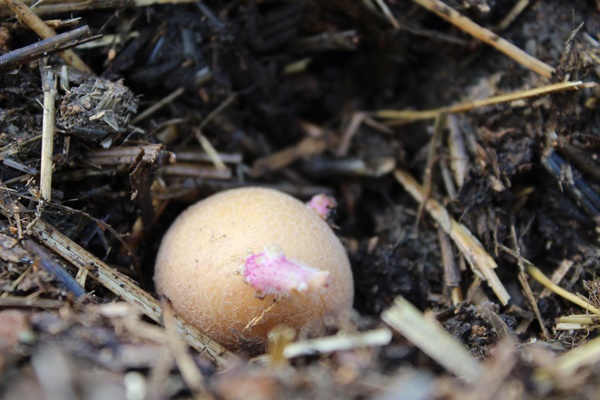
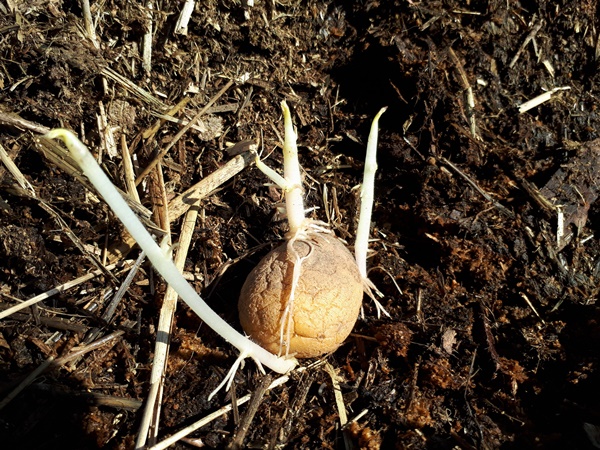
My son helped me and we planted the potatoes about 25-30 cm apart, paying attention to positioning the potato with the shoots pointing up. These shoots are going to be the leaves once grown out of the ground and need to be handled carefully. Some seed potatoes do not only have the shoots, but even already made some roots.
Last thing is closing the trench again. We planted different varieties and marked them with a number pack.

I only planted a fraction of the seed potatoes I have, so I am going to have to find some more solutions for all of these potatoes, but more to that in a different post.

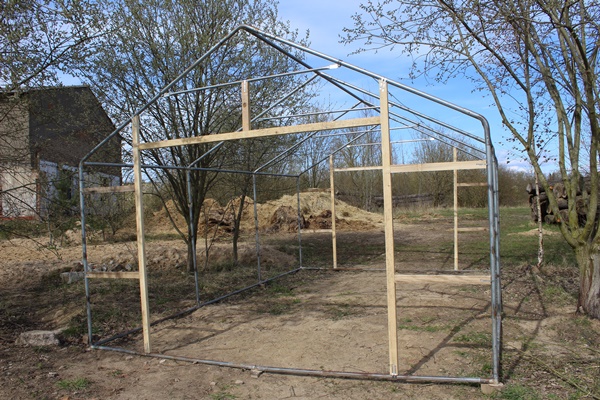
How we build an inexpensive 4×6 meters greenhouse
Last fall we took down the greenhouse roof we hat made in the garden. Since it only was a roof, the wind blew trough it and the cold night air could come in, so it did not bring much advantage for pre-cultivating and extending the season. The foil on top was damaged also, so we decided to take it down. Our growing season goes from May to a little in October (when we are lucky), so a real greenhouse for pre-cultivation followed by a tomato and pepper crop is necessary to bring a useful yield in our region. Last year we lost our tomato plants early to blight and the peppers did not do anything at all. Only the chili peppers did ok, but most stayed green and we do like the peppers to ripen and turn red.
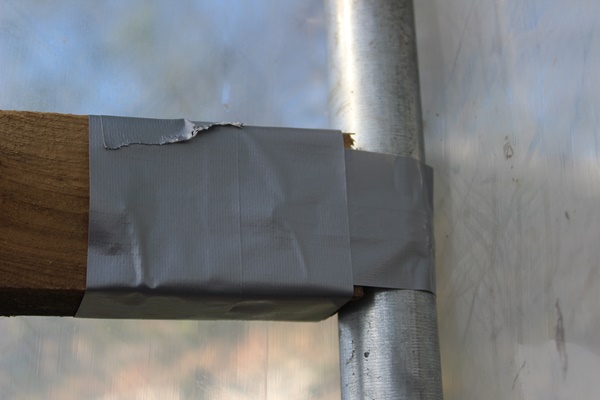
Last year the play tent of our children was damaged by a storm. The cover was torn and we trough that away. Some of the metal tubes where bend and snapped. We where able to fix these by putting a peace of wood in the tube and push the metal against each other. Obviously that leaves very sharp edges where we put some duct tape around.
After putting the metal frame together we made a wooden frame in the front and back for doors. We secured the battens with perforated metal strips around the metal frame. Obviously this also gives sharp edges (dangerous for the foil) and we also taped over these with duct tape.


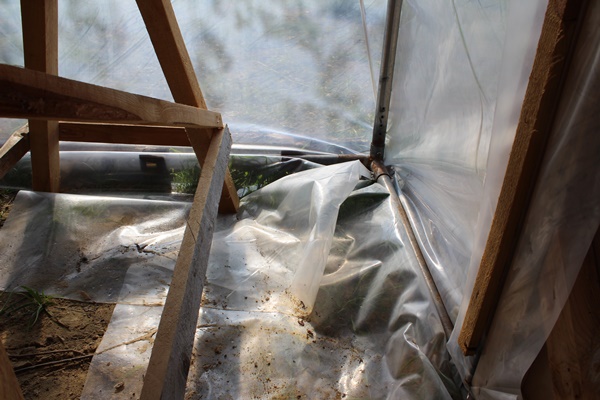
We bought a tear resistant greenhouse foil with 0.19mm thickness. The foil is nice and firm and we hat no problems handling it in means of, the foil did not tear. First we cut off the length we needed and rolled the greenhouse foil back up. To get the greenhouse foil over the frame, we did get some one to help us and of course the kid’s helped also. It is nice that we have a work platform for the front end loader of our tractor. This made getting the greenhouse foil over the roof a lot easier and safer. A big piece of foil like that is hard to handle, but somehow we managed to get the greenhouse foil over the frame. The wind made it a bit difficult, but we always have wind here, so it made no sense to wait for a better day to do this. With the kid’s helping to hold the greenhouse foil down we managed to pull the foil in place and staple it to the wooden doorframe. Above the doorframe we folded the greenhouse foil and also stabled it down. In the corners of the doorframe we hat to cut off some of the foil, folded it and also stabled it down.
To secure the greenhouse foil to the metal frame around the bottom I had purchased some metal clips. These clips are a little bit bigger as the metal tubes of the frame. To protect the foil for the metal clips we put some fabric in between and the clips worked wonderful. They snapped on and the foil stays where it is.

We folded the foil underneath the frame to the inside.
To hold the foil down when there is wind we also put some rope over cross over each segment of the fame, attaching the rope to a shackle and the shackle to a hole in the feet of the metal frame. Obviously we had to puncture the foil here, but I don’t think that will be a problem.


The battens we attached the foil to seem a bit small to attach such large doors to, so we upgraded the wooden frame, while securing the foil even more. We used boards to reinforce the doorframes, which my husband gave a nice decorative touch.

The doors are kept simple, with a rectangle frame out of battens with one cross batten and bracings in each corner. Then covered with foil, which we also stabled down.


To close the doors we used what we had. Some wood bocks that can turn for the secondary door, a metal pin to push in the ground and a padlock bracket with a snap ring for the primary door.
For now the greenhouse is finished and I can start using it, but before fall comes we will have to do something about the different openings the greenhouse has. There is a big slit above the doors we will have to do something about. Also the ground was not evenly, so there are several slits between the ground and the greenhouse as well. For now we put some logs before them, to keep the cats out of the greenhouse, but we will have to fill these with sand to keep the warmth in when it gets colder again.
At the moment I am just so happy we finally made a real greenhouse. The kid’s and I immediately started with pre-cultivating a lot of vegetables, herbs and flowers for the coming season.

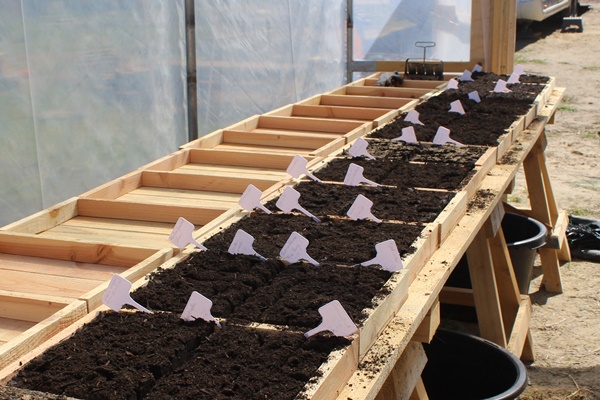
Even some lettuce has already sprouted.

During the day, when the sun is shining, the temperature rises up to 30°C and we open the doors to keep the heat down a little. At night the temperature still drops to about 2°C, so I am afraid to put my tomato and pepper plantlets in the greenhouse. I am worried that 2°C is to cold for them and I will kill the plantlets, so they will just stay in the caravan for now.

Since I have rhizomes’ grass growing everywhere I am not making raised beds in the greenhouse, but I am going to plant my tomatoes & peppers in mortar tubs and wooden made planters, but more too that after I planted my tomatoes & peppers in my new DIY greenhouse.


