For my last birthday I wished for some blueberry bushes to plant in our garden. We love the taste of blueberries and what we love so much we need to grow our selves. There is nothing compared to the taste of berries which are self grown and freshly picked and eaten right there in the garden.
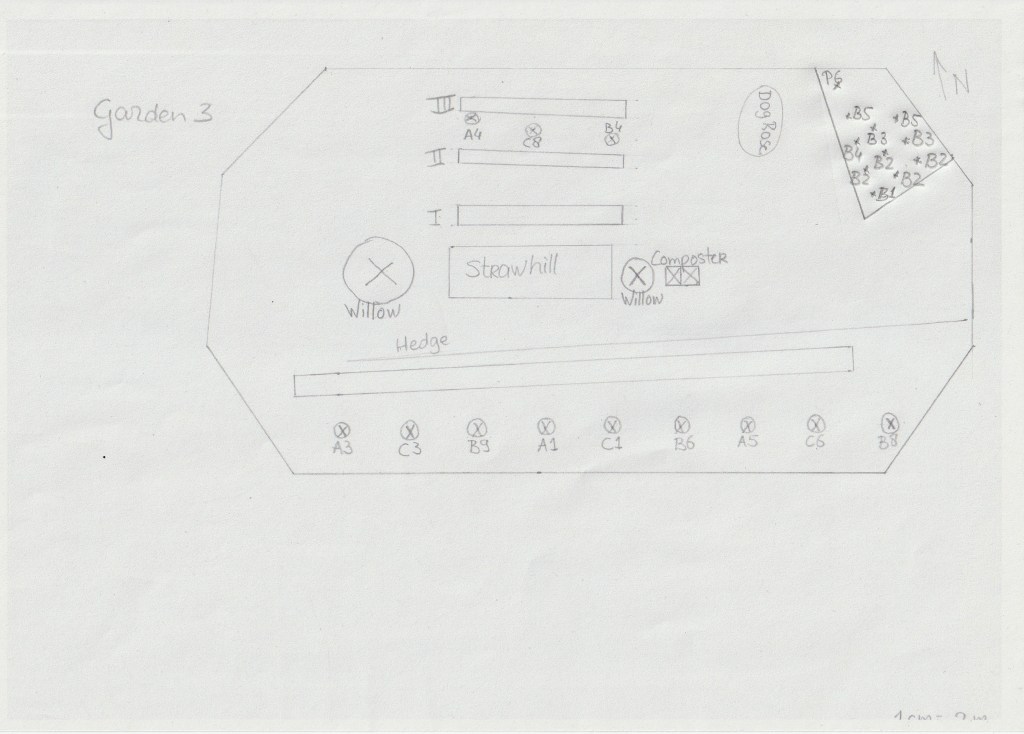
So we went and purchased 10 blueberry bushes last fall. It took a little while before we actually planted them, but finally we did. Blueberries need acetic soil and we have this corner in our garden 3 where we filled up a big hole with sawdust, bark and smaller pieces of wood from our sawmill a few years ago. We finished this of with a layer of normal soil. The organic matter has been decomposing and we thought the time was right for planting by now.
The blueberry bushes should be planted 2 meters apart, but we just divided the 10 bushes on the designated patch. I always find it difficult to respect the recommended plant spacing. The blueberry patch still looks so empty with only the 10 blueberry bushes and a panicle hydrangea. After planting we divided a thick layer of woodchips over the entire blueberry patch. At first it looked really tidy and ratter empty. The naked blueberry bushes where hard to see against the background of the woodchips. Obviously the woodchips did not really hold down the weeds, but at least the blueberries have gotten there leaves now and the blueberry patch does not look so empty any more.
We got 5 different kinds of blueberries with different ripening times and so I updated my garden layout of our garden 3.
Nursery in the spring and filled up with tomato plants, pepper plants and some more over the growing season
We build this greenhouse in the spring on the base of the broken play tent of our children. If you are interested here is the link to that.
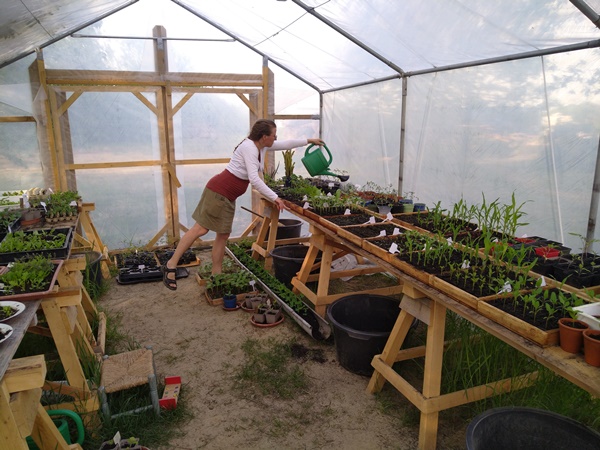
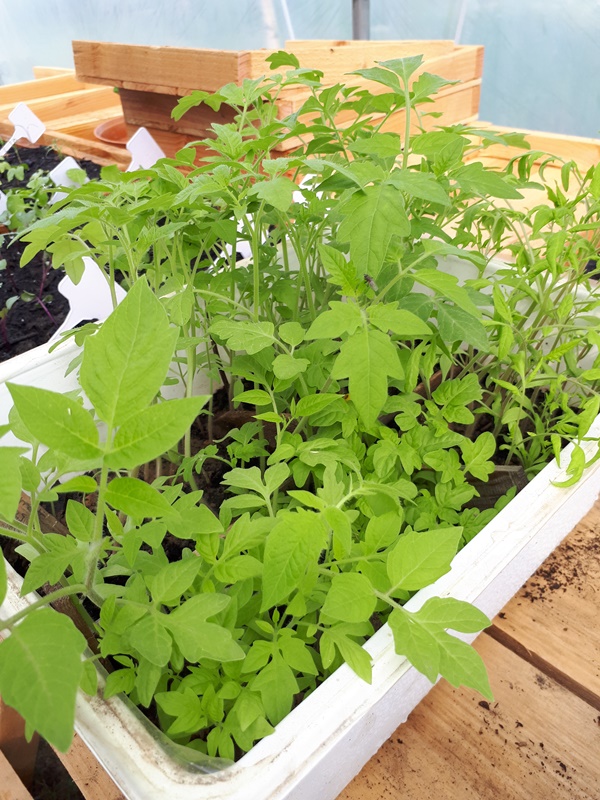
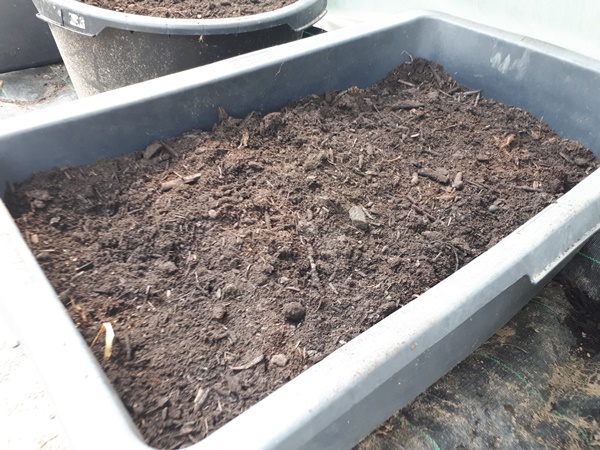
We first put up some make shift tables in the greenhouse and used the greenhouse as a nursery. I unfortunately do not have usable compost for starting seed, so I had the children sift out the bigger parts of potting soil I had purchased. My husband had made each of them there own sieves and they had a lot of fun. With the sifted soil we made soil blocks to sow in. We already had some crates, but my husband also made us a bunch of wooden trays exactly fitted for the soil blocks.
I had seen this in a video where one side of the tray is open. The idea is to put the soil blocks on a piece of cloth which hangs out of the open side. The over hanging cloth then needs to hang in a water reservoir of some sort. This way the cloth transports the water to the soil blocks and keeps them moist. Since I was not prepared with cloth and reservoirs, I will have to try this coming growing season. (A little reminder to myself to prepare!) This year I just used some water sprayers and a big tub we already had. The trays took turns soaking in the tub and in between soakings we would spray water over the soil blocks. Obviously this also functioned fine. It is just a little more labor intense.
We sowed a lot of different things like red beets, peas, cabbages, leeks, celeriac, different types of corn, lettuce, basil, amaranth, quinoa, sunflowers and different other types of flowers and everything else I am forgetting. This was a great joy. Everything sprouted quickly and the little seedlings did very well in the protection of the greenhouse.
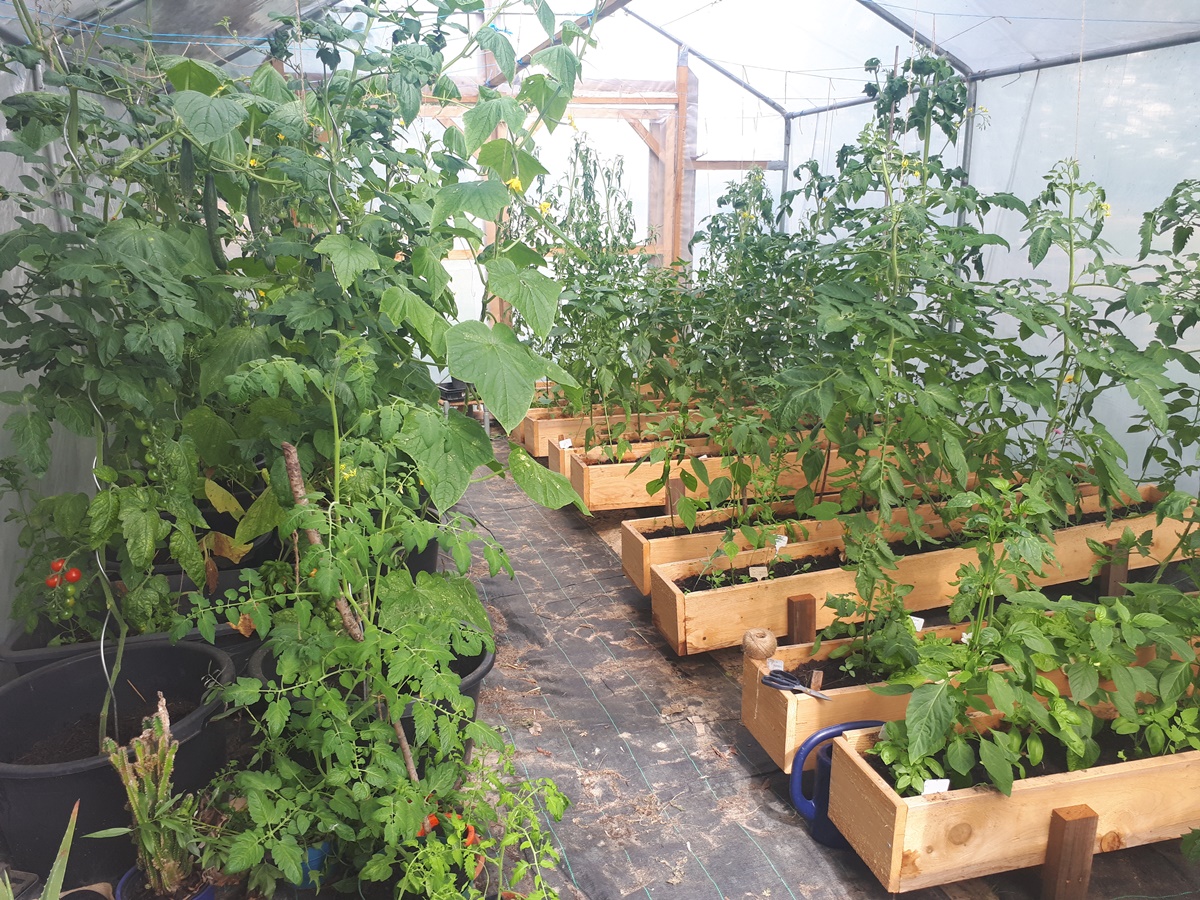
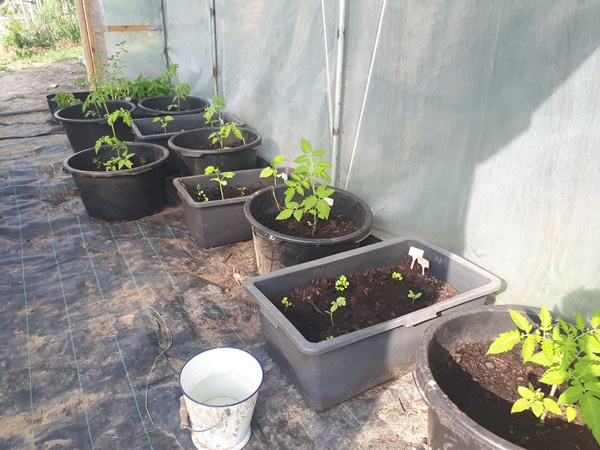
Also the peppers and tomato plants, I had sown indoors, transferred to the greenhouse as soon as the temperature did not drop too much anymore at night. The little seedlings where already getting to big for the sowing tray and we potted them op each in there own little pot. Since the kid’s filled the pots for me, this went very quickly. I went a little over board while sowing the tomatoes and peppers. I had way too many plants and did not know where to plant all of these, but as you could have read in a previous post we found places for them other than the greenhouse.
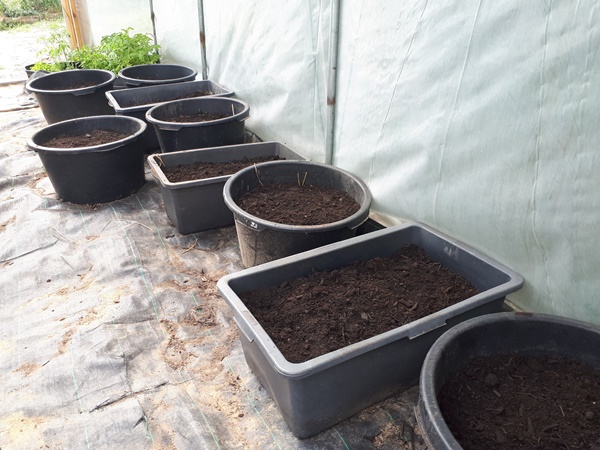
Well, after spring finally arrived (it stayed cold for very long this season) and we where able to plant a lot of the seedlings, one side of the greenhouse became empty and we started preparing for planting. We rowed up some mortar buckets and started filling them.
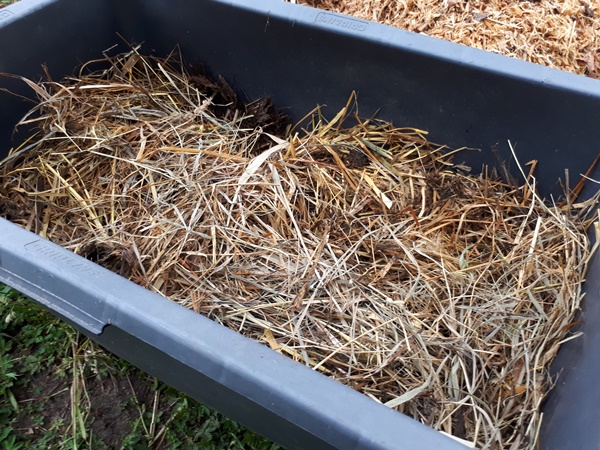
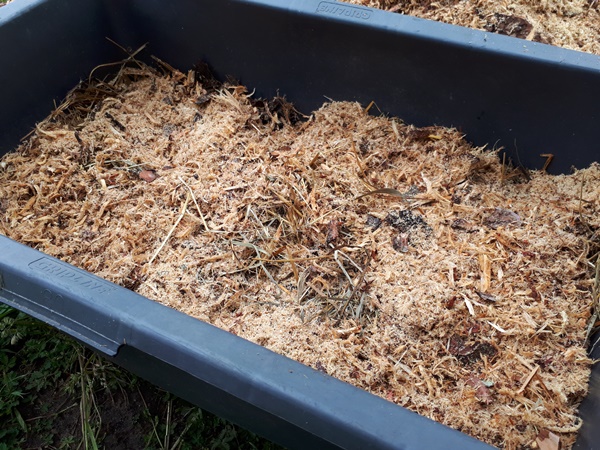
We started with a big layer of old straw and hay, then a layer of sawdust from our sawmill, then a layer of horse manure finishing with a good layer of potting soil to plant the seedlings in.
Mortar bucket filled half way with old straw and hayMortar bucket with a thin top layer of sawdustMortar bucket with a thin top layer of horse manureMortar bucket with a top layer of potting soil
We planted these mortar buckets with tomato plants, cucumber plants, some water melon and celery.
Beside the water melon, these plants where thriving and the soil kept its moisture even during the heat of summer. Obviously I would water almost every day. Only the cucumbers, I had planted 2 in one bucket, would suffer when I would skip a day of watering. I should have planted only 1 in a bucket.
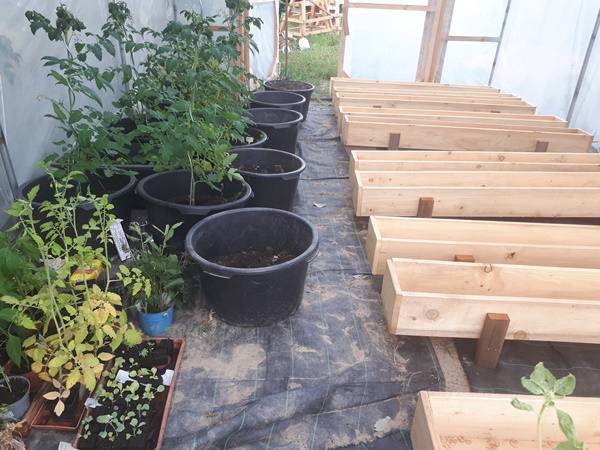
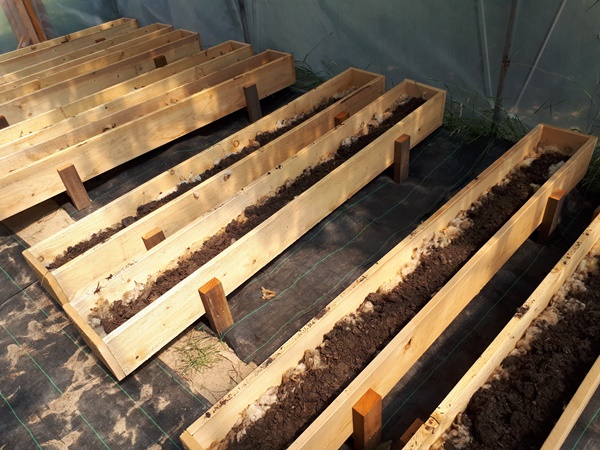
It took us until middle of July to get to plant the rest of the plants in the greenhouse. For that my husband builds me these planters out of wood (about 20 x 20 cm, 2 meters long). I decided to work with planters, because there is only compacted sand, tree roots and couch grass in the ground.
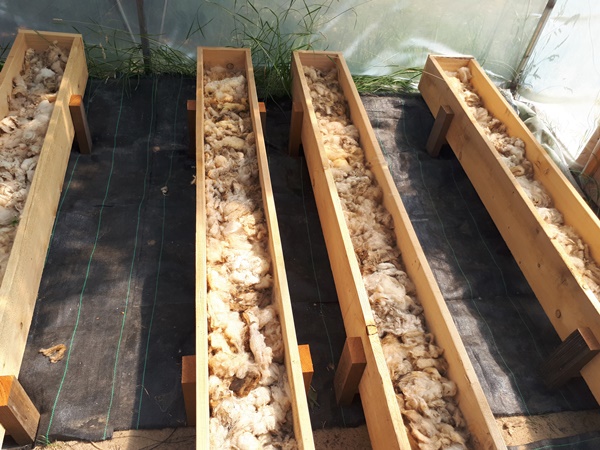
Since the planters aren’t very big, I started filling the planters with a nice layer of sheep wool to store moisture in the planters.
On top came a layer of horse manure for some extra nutrients, topping of with potting soil to plant in.
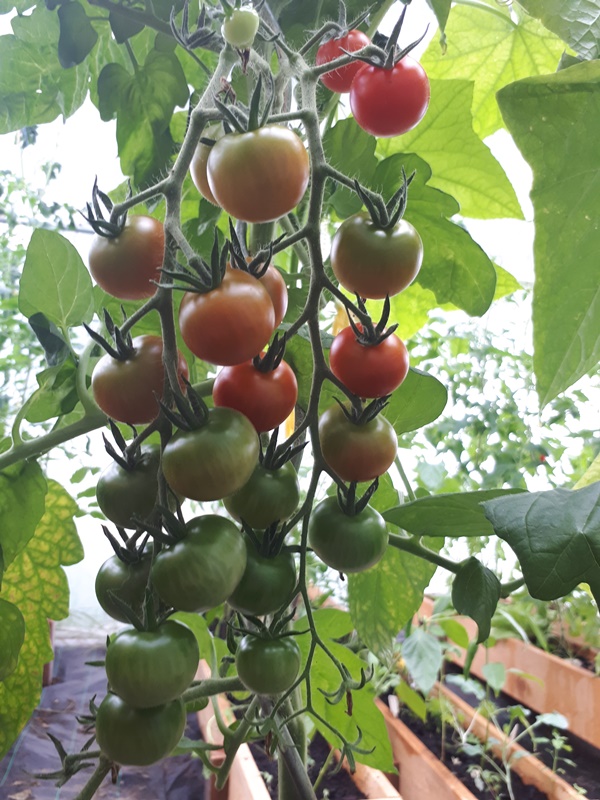
I planted 5 tomato plants in one planter. I always under estimate how big plants get and looking back, I would say 4 tomato plants in one planter are more then enough.
The peppers I planted 7 in one planter, but I think 5 would have been better. I have to trellis the peppers next year since there is too little soil for them to get hold in and the bigger plants fell over.
All in all we had a nice harvest from the greenhouse. We where able to snack on a lot of small delicious tomatoes right in the greenhouse. The kids loved that.
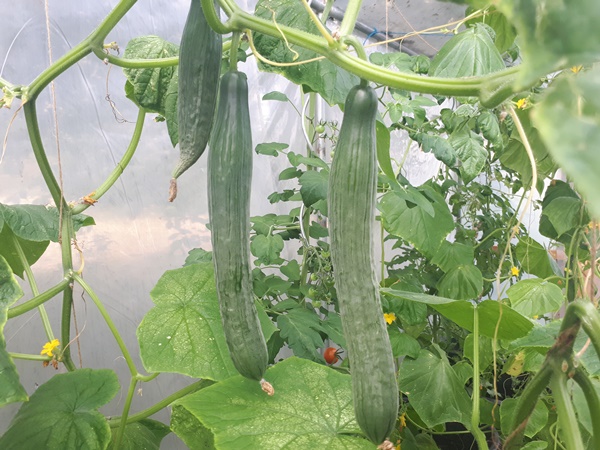
Once it became warm enough the cucumbers developed and we could eat cucumbers on a regular basis.
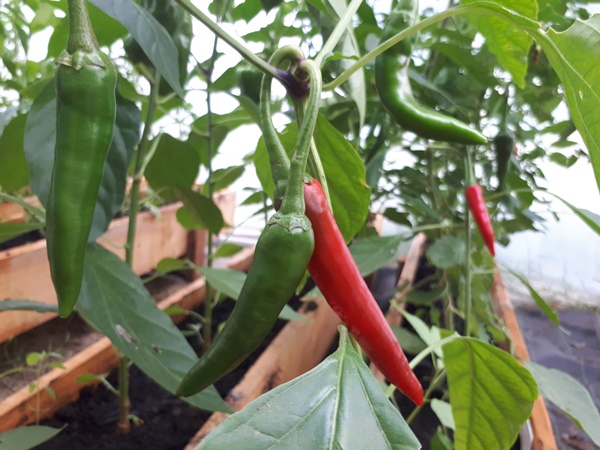
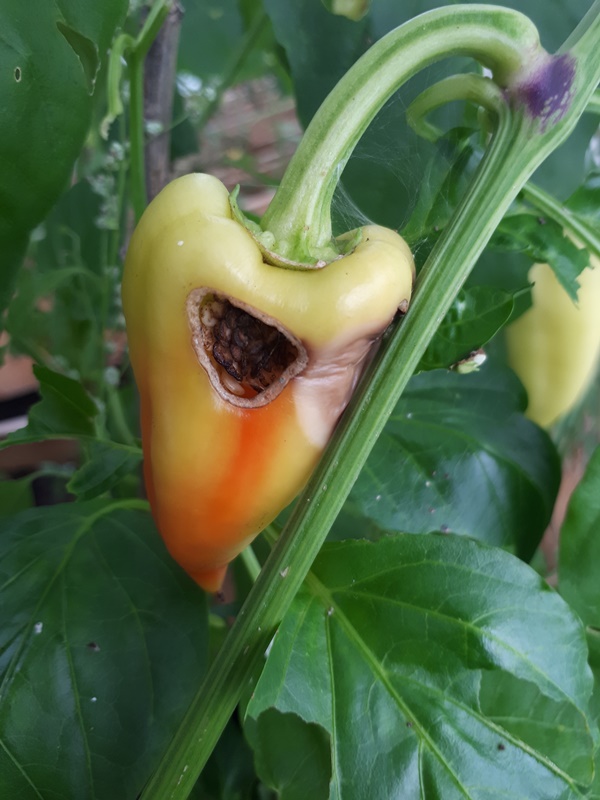
We had a good harvest of cayenne peppers for hot sauce which my husband loves.
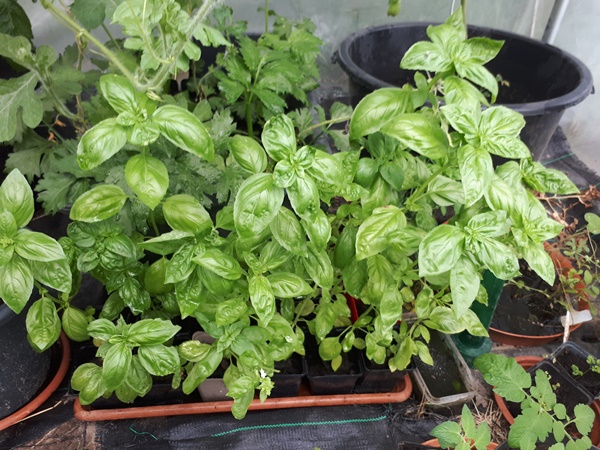
I had also sown some basil, potted them up in some small planters, but never came to planting them. Luckily they did very well in the small planters and I made some pesto with them. I definitely should grow a lot more basil next year, but it needs to grow in the greenhouse. I don’t know why, but the basil grown outside does not taste good. Maybe it is to cold here to grow good basil outside, I do not know.
I was a little late with planting peppers, so we where lucky to be able to harvest some peppers at all. I tried to let some peppers ripen indoors, but they did not taste so good. I think we are to far north to grow peppers in a cold greenhouse and we will only grow a few pepper plants next season to see if they turn out better if planted earlier. Furthermore we had some bug problems. They eat the peppers we would have been able to harvest first.
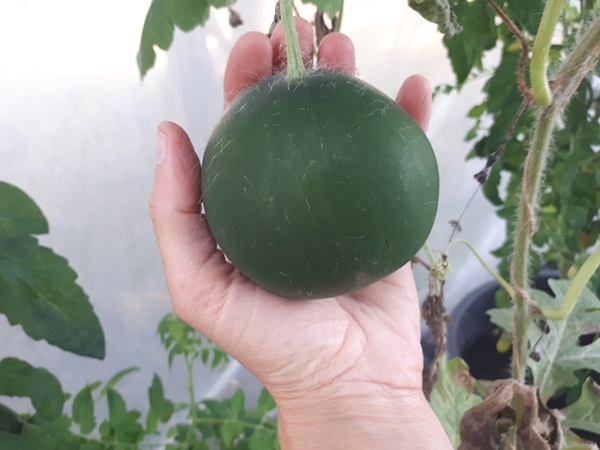
We actually where able to harvest a very small watermelon we let ripen some more indoors (frost was coming). It was small, but tasted very well. We where well into the season before a watermelon started to form. A lot of flowers started small watermelons, but they turned brown quickly. It would be nice to know why.
The celery I planted was a variety for the stalks. I planted this type of celery for the first time, because I have little luck with growing celeriac. The celery thrived and we love the stalks in our soups, so it is a good substitute for the celeriac. I will have to grow a lot more of the celery next season and I will try to grow it outside as well. The celery is in the picture with the basil just peeking up from behind the basil.
Beginning of October the blight also struck inside the greenhouse. Most of the snack tomatoes where done and eaten, but the bigger tomatoes still had a lot of nice green tomatoes hanging on the plants. We harvested the good green tomatoes and the last cayenne peppers and I made them to hot sauce, so they would not go to waste.
After that we cleared the greenhouse. I wanted to try to use the greenhouse over winter for some lettuce, welsh onions and some dill. Then, one night, our runner ducks where taken by a wild animal and we started locking our geese in the greenhouse at night for protection. So that experiment is done with. A priority now is to build a decent coup with a door for the geese, before I need the greenhouse for starting seedlings in the spring.
Some Notes for the next growing season
In August the greenhouse was like a little jungle and I do not really like diving underneath the plants to look for eatables. Furthermore the wooden planters where to close to each other and I was damaging plants trying to get through for watering, so I am going to make some changes in the greenhouse.
I am taking out 2 wooden planters and space out the other 8 planters, so I will have more space for the 4 walkways in between them, starting with one planter at the wall and putting 2 planters together between walkways. Furthermore the height of the planters will be increased to give the plants more soil to root in and have more material (soil) to store moisture.
The 2 extra wooden planters will find there place next to each other at the wall where the mortar buckets are now. These will be for the cucumbers, so I can trellis them parallel to the wall, instead of having to trellis them to the middle of the greenhouse. This way I can reach the plants better. To utilise as much space as possible I will keep some mortar buckets in front of these wooden planters with enough space in between so I can reach the plants in the wooden planters behind them comfortably.
This way there will be space for 4 cucumber plants, 5 pepper plants, 10 cayenne pepper plants and 20 tomato plants. Basil and celery will be interplant in between those plants and the mortar buckets will be for the kid’s to use. They love to help with growing food and had been cramping every space in the greenhouse I had allowed them last growing season.
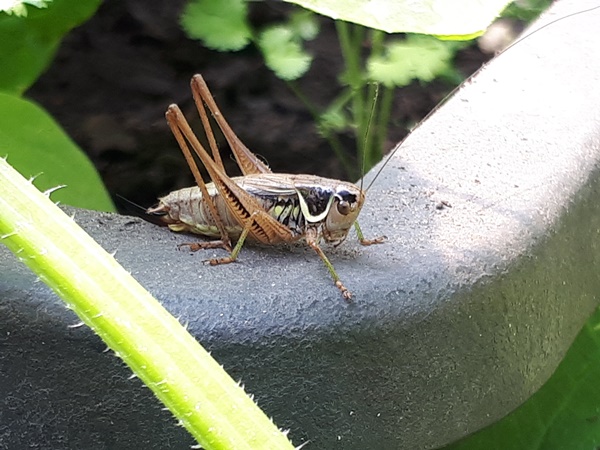
Visitors in the greenhouse
A beautiful spider in its webA beautiful grasshopper
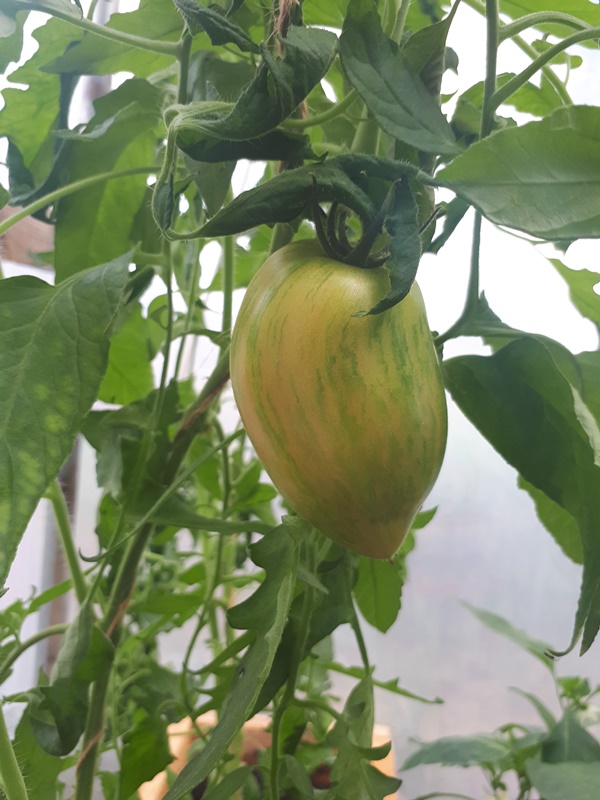
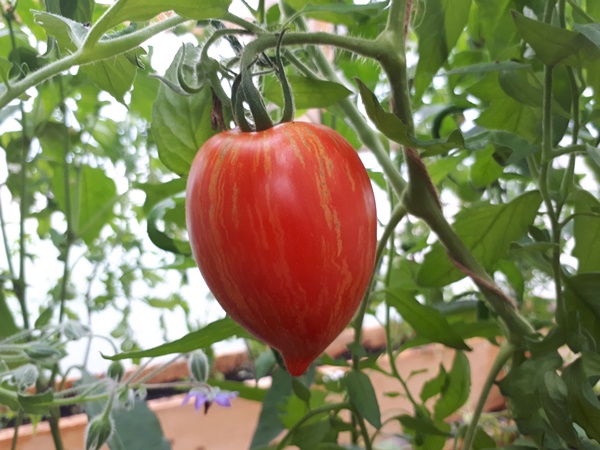
Tomato Marmorossa
We grew this tomato variety for the first time last season and loved it. It looks beautiful and tasted amazing. We saved seed from this variety for next season.
How did we grow potatoes under mulch and how did the potatoes do?
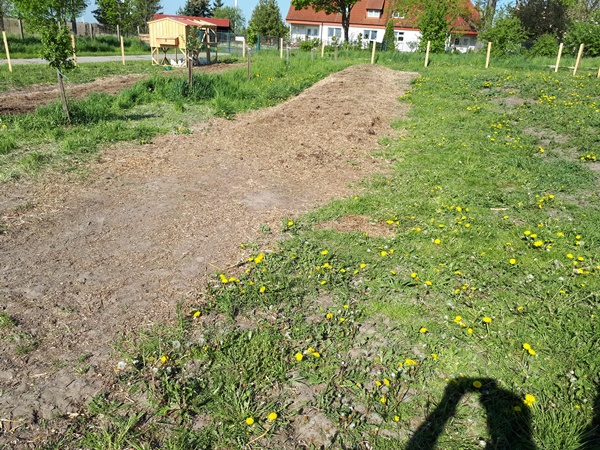
Since I had way too little dedicated growing space to grow potatoes, I had this vision of mulching a larger, still unused, patch beside one of the compost beds to grow potatoes. On this spot there used to be a very large bush of brambles, which my husband took down with a flail mower about 2 years ago. Left is a ratter bare patch with brambles growing back, little grass and mostly other weeds with a slight slope going down towards the compost bed. We have been simply mowing this patch every few weeks.
Compost bed beside the empty patch where the potatoes are meant to be planted under a thick layer of mulch
Now that we have the manure spreader we have the possibility to “easily” cover the entire area with mulch. We got 2 trailers full of the content of a horse stable, so mainly hay, straw and some horse pop. As good as it went; my husband divided it over the entire patch with some handwork to make it more evenly.
Mulched garden patch beside the compost bed
By the time we got this done the seed potatoes in our storage looked like this.
Sprouted potatoes long overdue for planting
A tangled mess I would not know how to get undone without breaking all of the sprouts, after which the seed potatoes would not grow anymore. What amazes me is that the seed potatoes where already growing new potatoes.
New potatoes on potato sprouts in storage
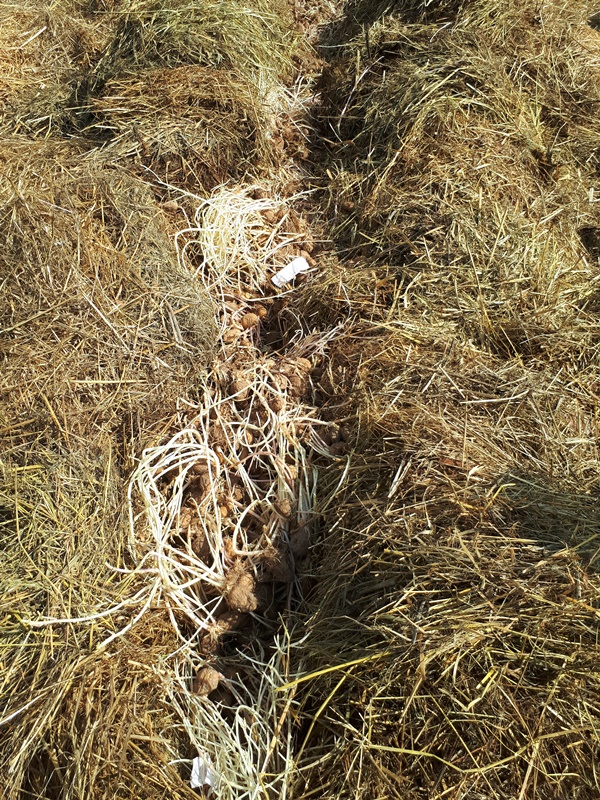
Since we needed to dump these seed potatoes some where, we just moved some mulch aside, put the seed potatoes in there and put the mulch back.
Ditch with lots of sprouted seed potatoes
As expected this did not do anything, but last spring I had bought some potatoes in the supermarket and did not use all on time. Some of them looked like useful seed potatoes. I also planted these seed potatoes underneath the mulch, but correctly with some space in between, setting the potato on the soil underneath the mulch. This was the beginning of July, which I normally would think as pretty late to plant potatoes, but I wanted to try it anyway.
Sprouted seed potato set in mulch for planting
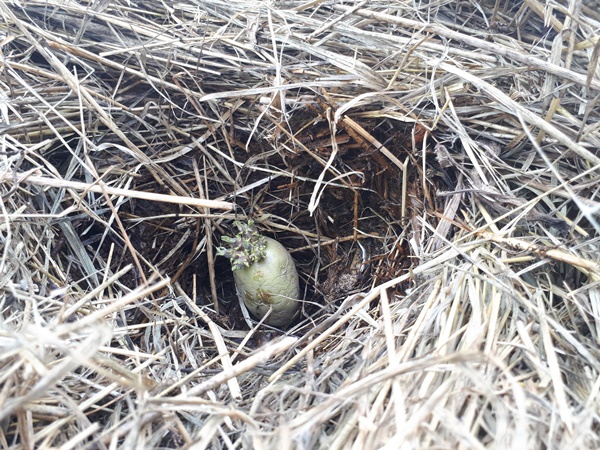
Most of these seed potatoes grew well over summer. This picture and the picture at the beginning of the post are from the beginning of September. Good and healthy looking potato plants.
Healthy looking potato plants beginning of September
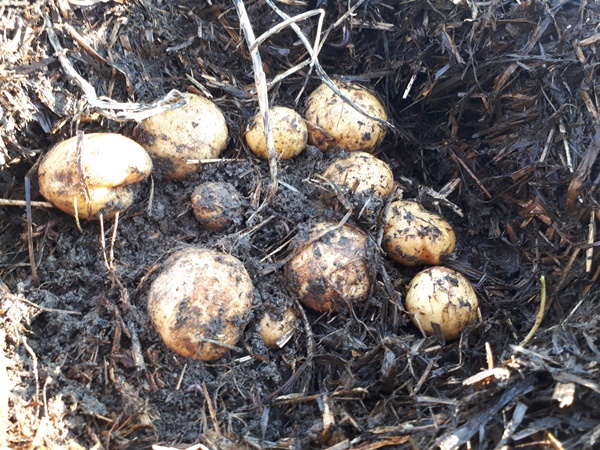
Unfortunately it took me until the second half of November to find the time to harvest these potatoes. It was hard to find where I should dig, since the potatoes had already died back completely. The potatoes on the top of the slope did very well and I actually found a few very large potatoes among more normal size once.
Cleared potatoes while harvesting
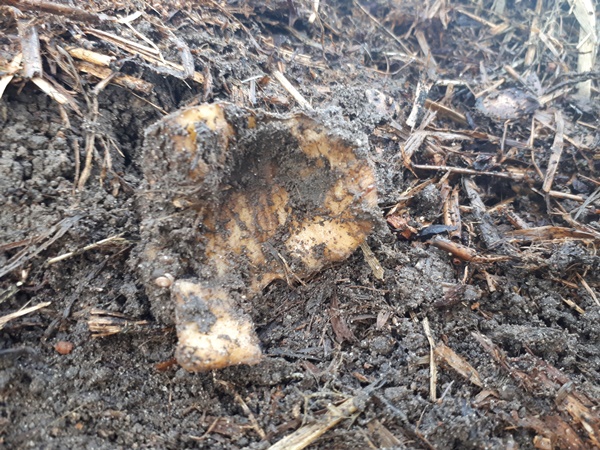
The potatoes at the bottom of the slope where all rotten and mush, since the rainwater has collected there and kept everything to wet. Other than that I found some seed potatoes with a bunch of fingertip size potatoes attached to them. I have no clue why they grew this way.
Mushy seed potato with lots of baby potatoes
The worst part of being so late with digging these potatoes up is that the mice beat me to most of them. I found a whole labyrinth of mouse tunnels and some bits and pieces of left over potatoes.
Potato rest after mice banquet
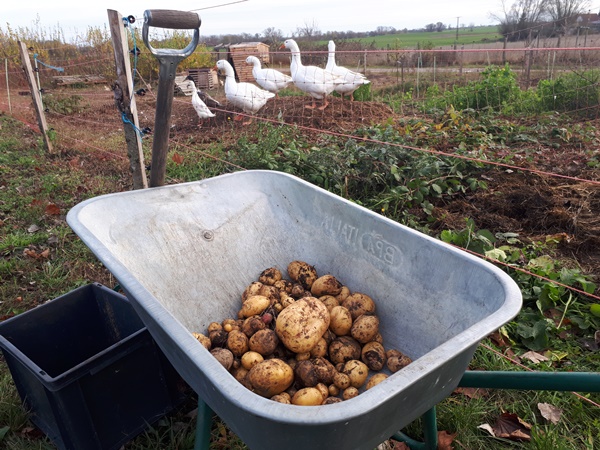
I did not plant many decent seed potatoes, so I am very happy with the potatoes I was able to harvest of these few potato plants. While harvesting our geese kept me company.
All done, so nothing to watch anymore
These potatoes are about 4 meals worth for my family and the other potatoes we grew are already used up, so I won’t come around to buying potatoes this winter. Next year we really have to prioritize planting potatoes. We love eating them and would need a whole lot to get trough the winter without buying any.
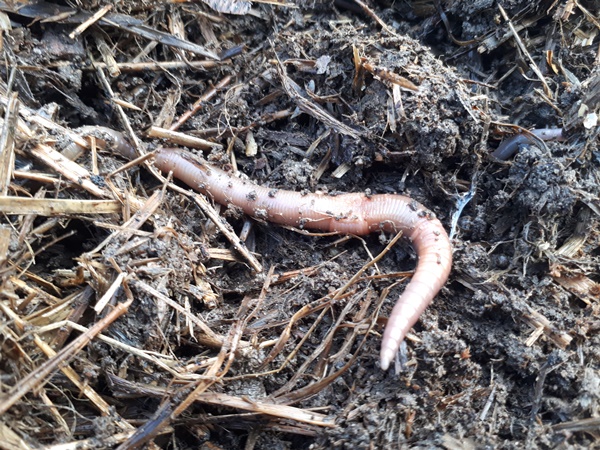
O and I also found lots and lots of earthworms, even very large once.
A large earthworm
To conclude I would say growing potatoes under mulch is a success and makes it a lot easier to harvest, but the excess water needs to be able to flow away. The mulch layer should be fairly thick, so the potatoes will not be exposed to the sunlight, and the seed potatoes should be put down on the soil underneath the mulch. The roots need soil to grow into. They do not do well in only mulch. Also planting potatoes in July was a great success, so I do not need to worry about planting the potatoes early in the season. I can divide planting the potatoes over a longer time frame, which is very nice. This way I can divide the work and have fresh potatoes from the garden over a very long time. Mainly I will have to prioritize harvesting the potatoes after they are done. It is easier to find the plants and know where to dig and the mice will not have eaten all of the potatoes yet.