I planted this potato bed a little over 3 weeks ago (Link).
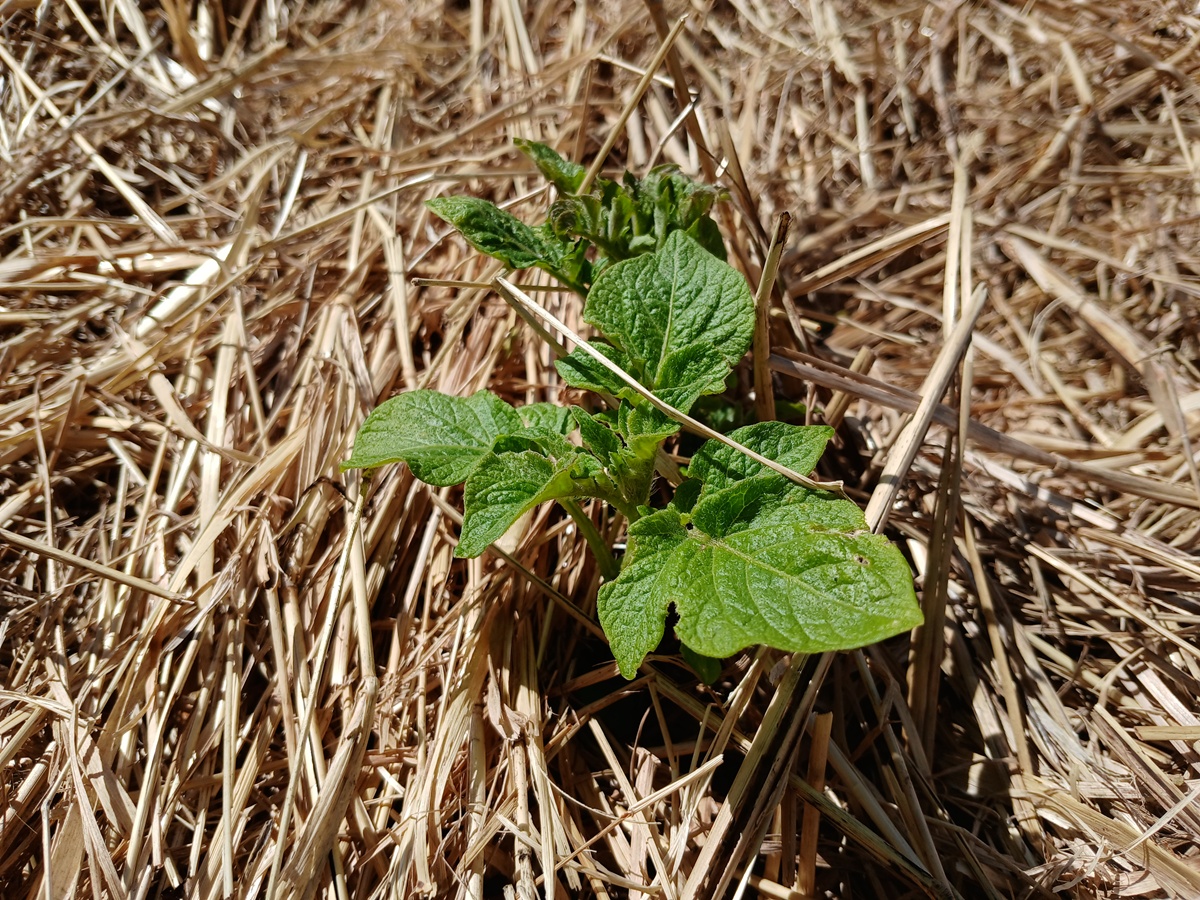
Potato popping trough the hay
It took a little over 3 weeks, but a few potatoes are finally popping up trough the thick mulch layer out of hay

It took a little over 3 weeks, but a few potatoes are finally popping up trough the thick mulch layer out of hay
I planted this potato bed a little over 3 weeks ago (Link).

How did we grow potatoes under mulch and how did the potatoes do?
Since I had way too little dedicated growing space to grow potatoes, I had this vision of mulching a larger, still unused, patch beside one of the compost beds to grow potatoes. On this spot there used to be a very large bush of brambles, which my husband took down with a flail mower about 2 years ago. Left is a ratter bare patch with brambles growing back, little grass and mostly other weeds with a slight slope going down towards the compost bed. We have been simply mowing this patch every few weeks.
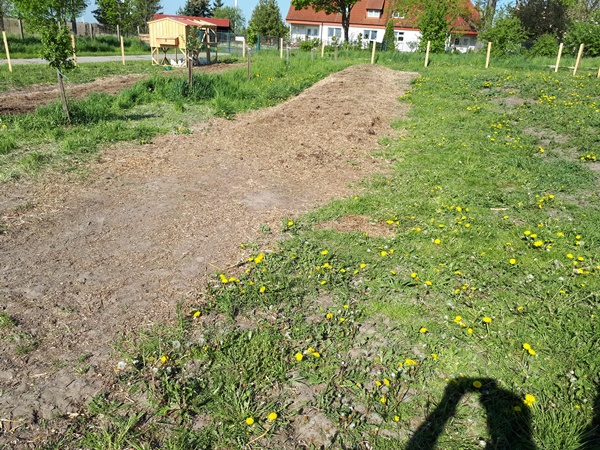
Now that we have the manure spreader we have the possibility to “easily” cover the entire area with mulch. We got 2 trailers full of the content of a horse stable, so mainly hay, straw and some horse pop. As good as it went; my husband divided it over the entire patch with some handwork to make it more evenly.

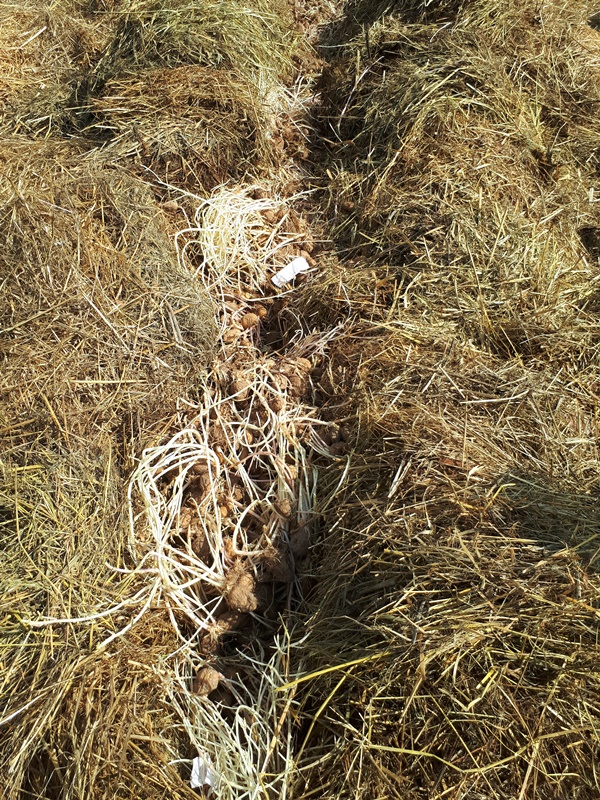
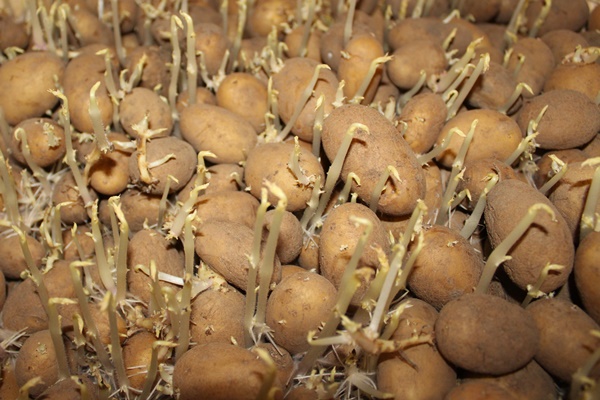
By the time we got this done the seed potatoes in our storage looked like this.

A tangled mess I would not know how to get undone without breaking all of the sprouts, after which the seed potatoes would not grow anymore. What amazes me is that the seed potatoes where already growing new potatoes.

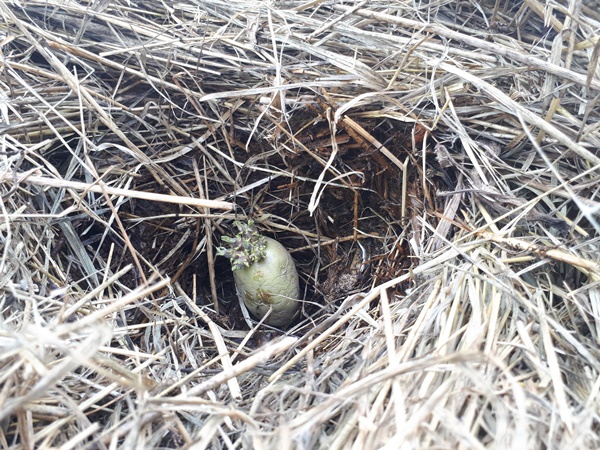
Since we needed to dump these seed potatoes some where, we just moved some mulch aside, put the seed potatoes in there and put the mulch back.
As expected this did not do anything, but last spring I had bought some potatoes in the supermarket and did not use all on time. Some of them looked like useful seed potatoes. I also planted these seed potatoes underneath the mulch, but correctly with some space in between, setting the potato on the soil underneath the mulch. This was the beginning of July, which I normally would think as pretty late to plant potatoes, but I wanted to try it anyway.
Most of these seed potatoes grew well over summer. This picture and the picture at the beginning of the post are from the beginning of September. Good and healthy looking potato plants.

Unfortunately it took me until the second half of November to find the time to harvest these potatoes. It was hard to find where I should dig, since the potatoes had already died back completely. The potatoes on the top of the slope did very well and I actually found a few very large potatoes among more normal size once.
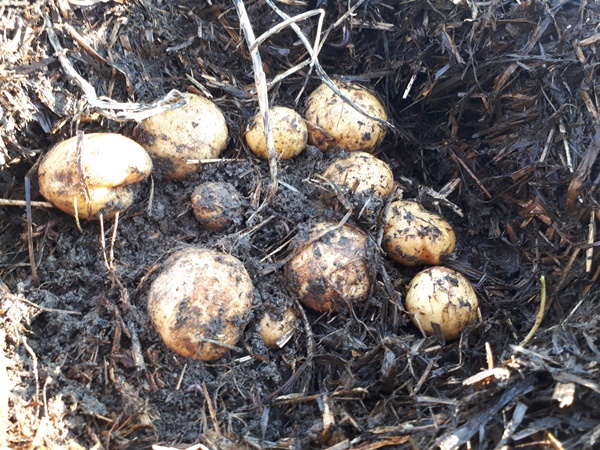
The potatoes at the bottom of the slope where all rotten and mush, since the rainwater has collected there and kept everything to wet. Other than that I found some seed potatoes with a bunch of fingertip size potatoes attached to them. I have no clue why they grew this way.

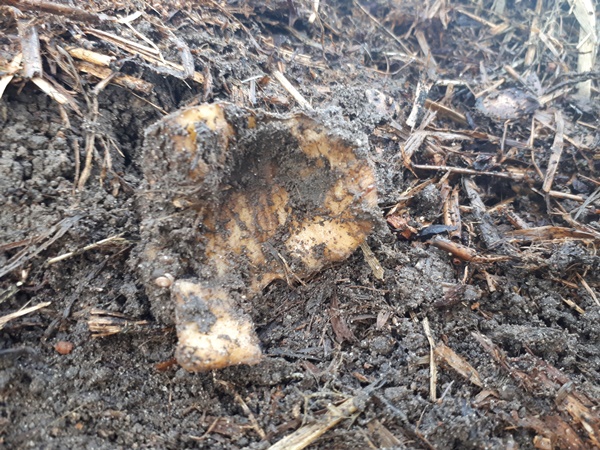
The worst part of being so late with digging these potatoes up is that the mice beat me to most of them. I found a whole labyrinth of mouse tunnels and some bits and pieces of left over potatoes.
I did not plant many decent seed potatoes, so I am very happy with the potatoes I was able to harvest of these few potato plants. While harvesting our geese kept me company.
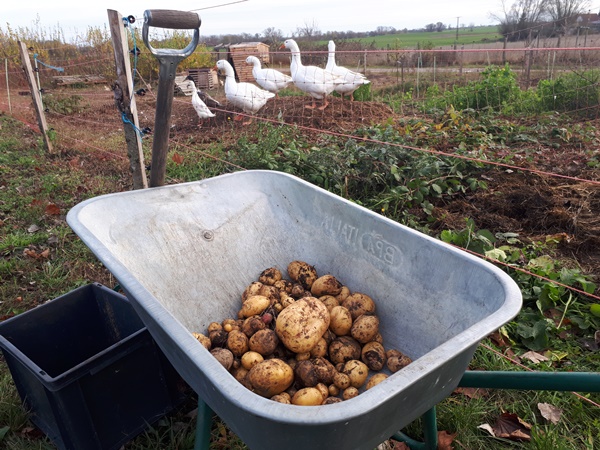
These potatoes are about 4 meals worth for my family and the other potatoes we grew are already used up, so I won’t come around to buying potatoes this winter. Next year we really have to prioritize planting potatoes. We love eating them and would need a whole lot to get trough the winter without buying any.
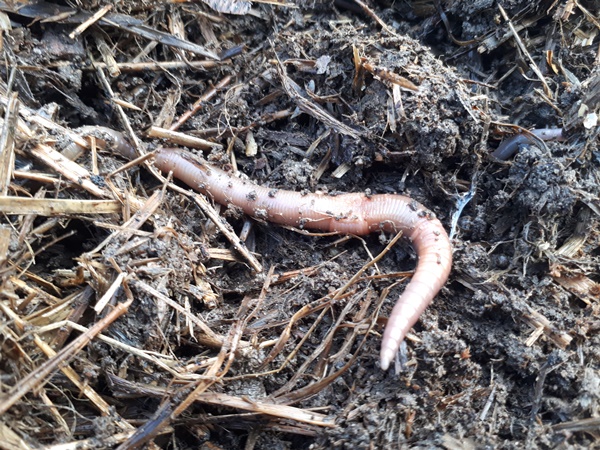
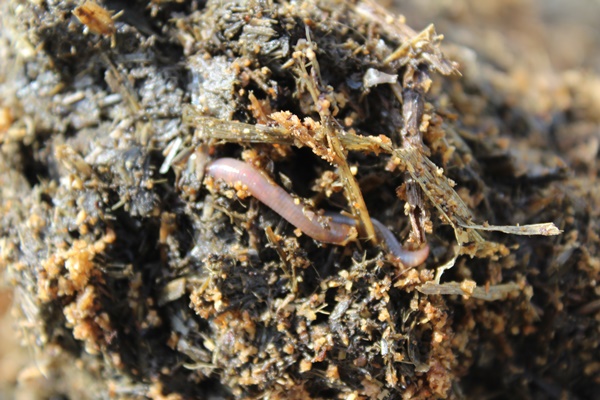
O and I also found lots and lots of earthworms, even very large once.
To conclude I would say growing potatoes under mulch is a success and makes it a lot easier to harvest, but the excess water needs to be able to flow away. The mulch layer should be fairly thick, so the potatoes will not be exposed to the sunlight, and the seed potatoes should be put down on the soil underneath the mulch. The roots need soil to grow into. They do not do well in only mulch. Also planting potatoes in July was a great success, so I do not need to worry about planting the potatoes early in the season. I can divide planting the potatoes over a longer time frame, which is very nice. This way I can divide the work and have fresh potatoes from the garden over a very long time. Mainly I will have to prioritize harvesting the potatoes after they are done. It is easier to find the plants and know where to dig and the mice will not have eaten all of the potatoes yet.

Tilling half of the compost bed to see if there will be a difference in potato harvest this fall
Finally we have finished the fence around garden 3, so the dogs can’t get in anymore, and it is potato planting time. I have been looking forward to finally starting to plant potatoes.
A little over 2 months ago we flail mowed over this experimental compost bed, hoping to improve the decomposing process. On top the result looked nice, but underneath the straw was untouched. At the time we did not have a rotary tiller, which we would have preferred to use, so we just let the compost bed be and see what happens with time.
Now, 2 months later, after doing some digging we found the compost bed looking quite ok, but obviously the material has not broken down completely. At least the rainwater could soak in and all of the material was wet and the decomposing process has progressed. There are a lot of earthworms in the compost bed, which is a good sign.

The compost bed is not finished decomposing yet and I hope it will be good enough for the potatoes to start in. Since I have way to little planting space for all of the potatoes it will have to do.
Recently we found a used rotary tiller for an acceptable price and where able to purchase this. Not quite curtain about the usability of the compost bed and I was worried that the rotary tiller would kill all of the earthworms, we decided to rotary till half of the compost bed and see if it will make a difference in harvest once the potatoes are done.

The rotary tiller we have purchased was modified by the previous owner, who had fixed the retaining board in a certain position. Normally the retaining board is hung up with some chains enabling the board to move up and down as needed. Using a rotary tiller for the fist time we just left that how it was. We tilled over half of the experimental compost bed twice and noticed that we need to do something about the rigid retaining board. Since the compost material is very moist the rigid retaining board pulled grooves in the material, which I closed by hand.

Starting half way the compost bed some material was thrown over back wards on the part of the compost bed we did not till. I shovelled that back and made the tilled part of the compost bed nice and evenly. The tilled part of the compost bed looked nice and fluffy and was much higher as the part we did not till. All of the different material was mixed together well (small parts, bigger parts, already decomposed material).
I only have a lot of small potatoes left in my storage and these are al sprouting. (Unfortunately I am buying potatoes for eating at the moment) This means I have more than enough seed potatoes and I did not buy any.
This does raise the question as to where on earth am I going to plant all of these potatoes? Well, I am starting in this experimental compost bed and just go from there.
In the part of the compost bed that we tilled, it was very easy to make a trench in the loose material.

On the other hand I very much regretted not to have tilled the entire bed while making a trench in the part that we have not tilled. This material was ratter compact and hard work to make the trench.


I made two trenches about 50-60 cm apart. The distance in the row could have been a bit more, but the compost bed is not wide enough for that.

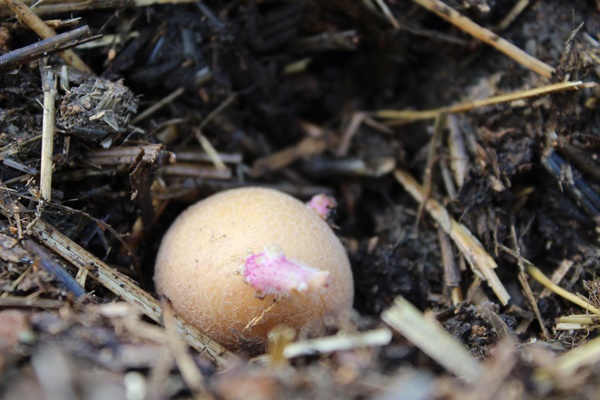
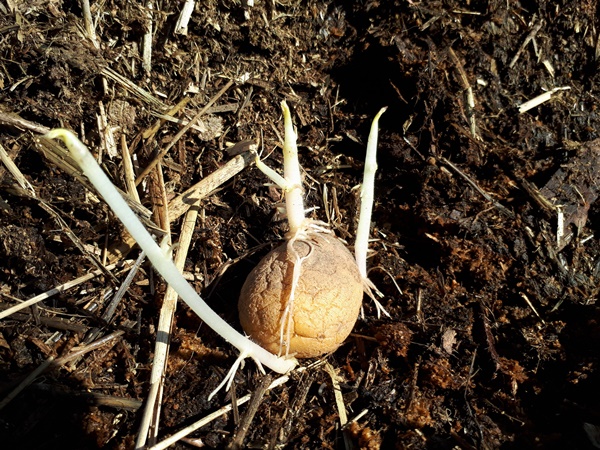
My son helped me and we planted the potatoes about 25-30 cm apart, paying attention to positioning the potato with the shoots pointing up. These shoots are going to be the leaves once grown out of the ground and need to be handled carefully. Some seed potatoes do not only have the shoots, but even already made some roots.
Last thing is closing the trench again. We planted different varieties and marked them with a number pack.

I only planted a fraction of the seed potatoes I have, so I am going to have to find some more solutions for all of these potatoes, but more to that in a different post.


